Microsoft Teams
In this guide, we'll show you how to send notifications via Microsoft Teams, using Courier.
To send notifications via Microsoft Teams, a Microsoft Teams Bot is required. You may use an existing or create a new one.
Set Up Chat Using Microsoft Teams
This step-by-step guide will walk you through sending a notification to a channel or user on Microsoft Teams using Courier. You will:
Prerequisites
You will need both Courier and Microsoft Teams accounts to complete this tutorial. If you don't have accounts already, sign up before proceeding. You will also need permission to install apps to Teams. Either an administrator can grant you this permission or you can sign up for a free Microsoft 365 developer program tenant.
Create a Microsoft Teams Bot
Step 1: Sign up for a Microsoft 365 Developer Account
If you do not have a Microsoft 365 developer account, follow the instructions from this guideline to create an account. If you already have an account, you can skip this step.
Step 2: Create an MS Teams App
Create a new App in Teams. You will need to install the Developer Portal from the Team Apps.
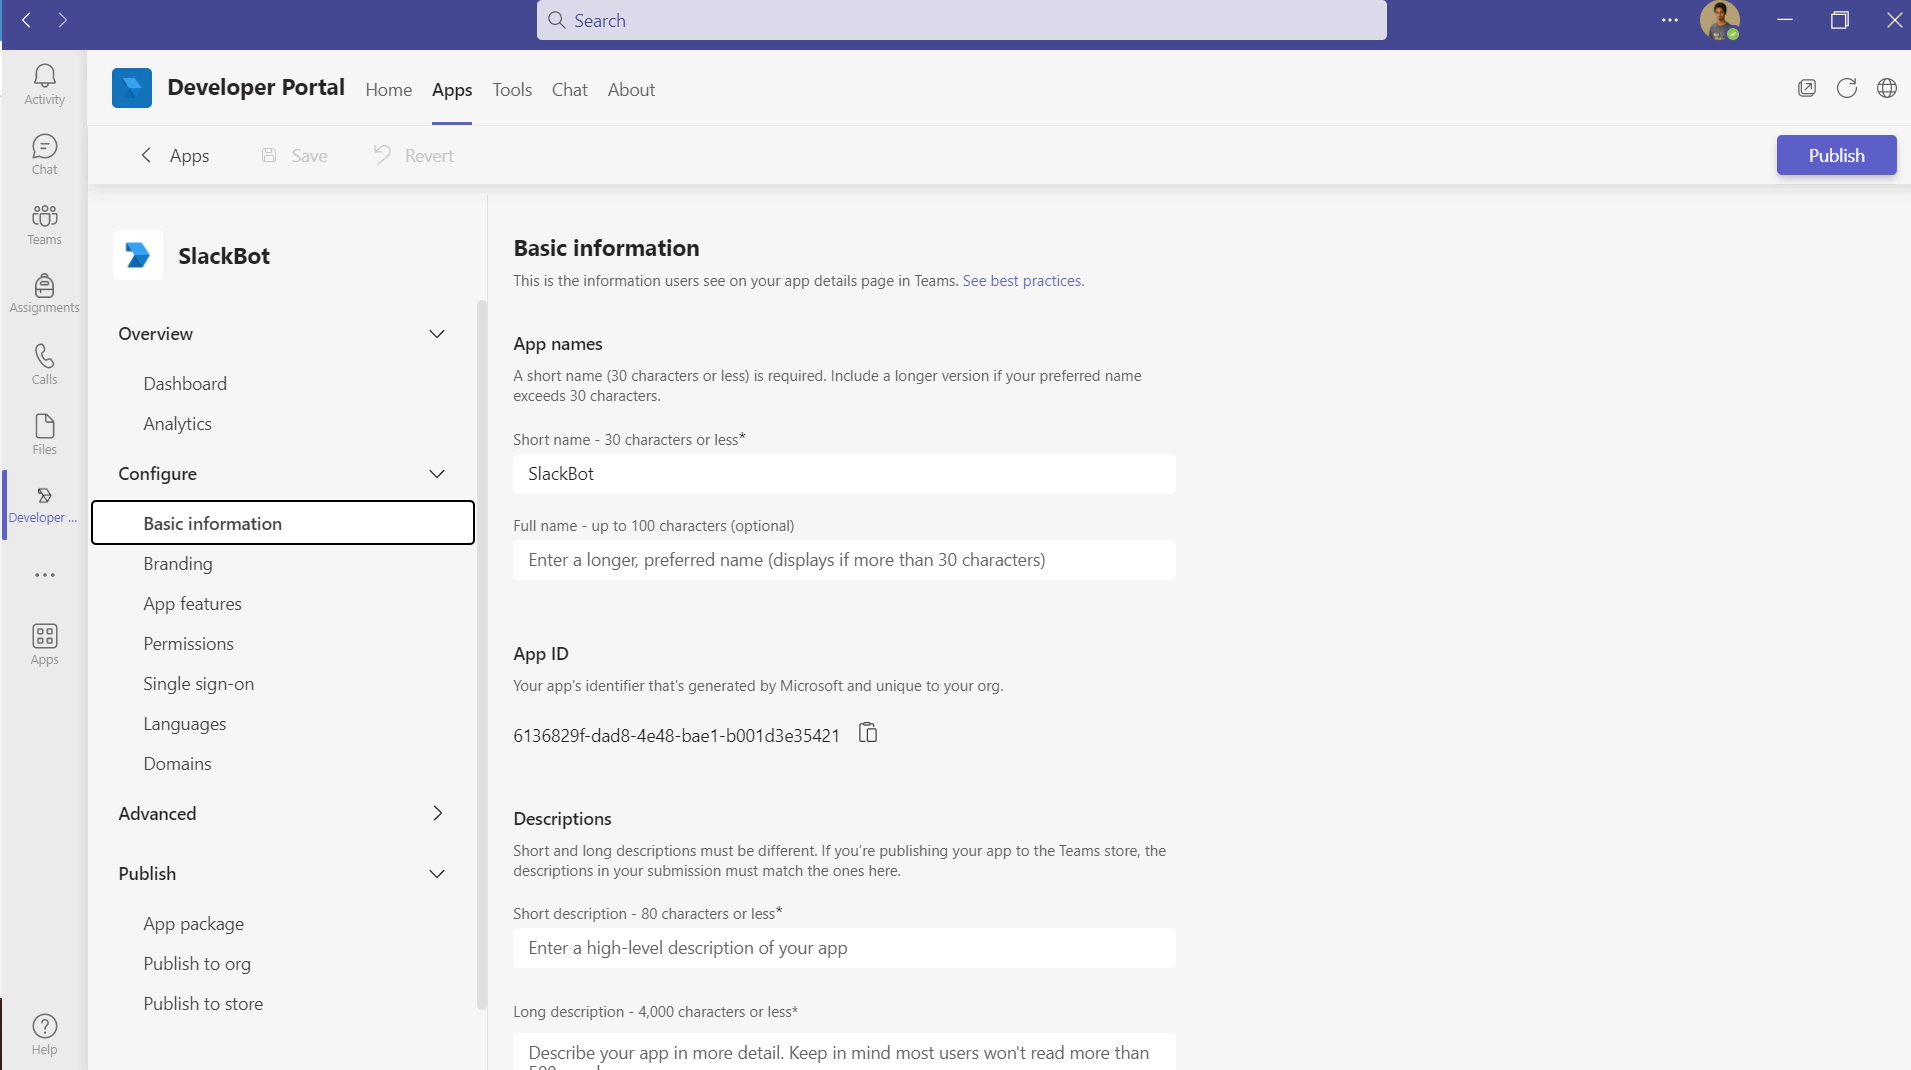
After installing the Developer Portal, navigate to the Apps tab and click the New App button. Then, you will get prompted to enter the application name.

After clicking the Add button, you will be redirected to a new window where you can see the App ID. Make sure to copy the App ID for later use.
Next, click App features from the left menu and click on the tile named Bot. This will open a new window for selecting a bot and bot scopes.
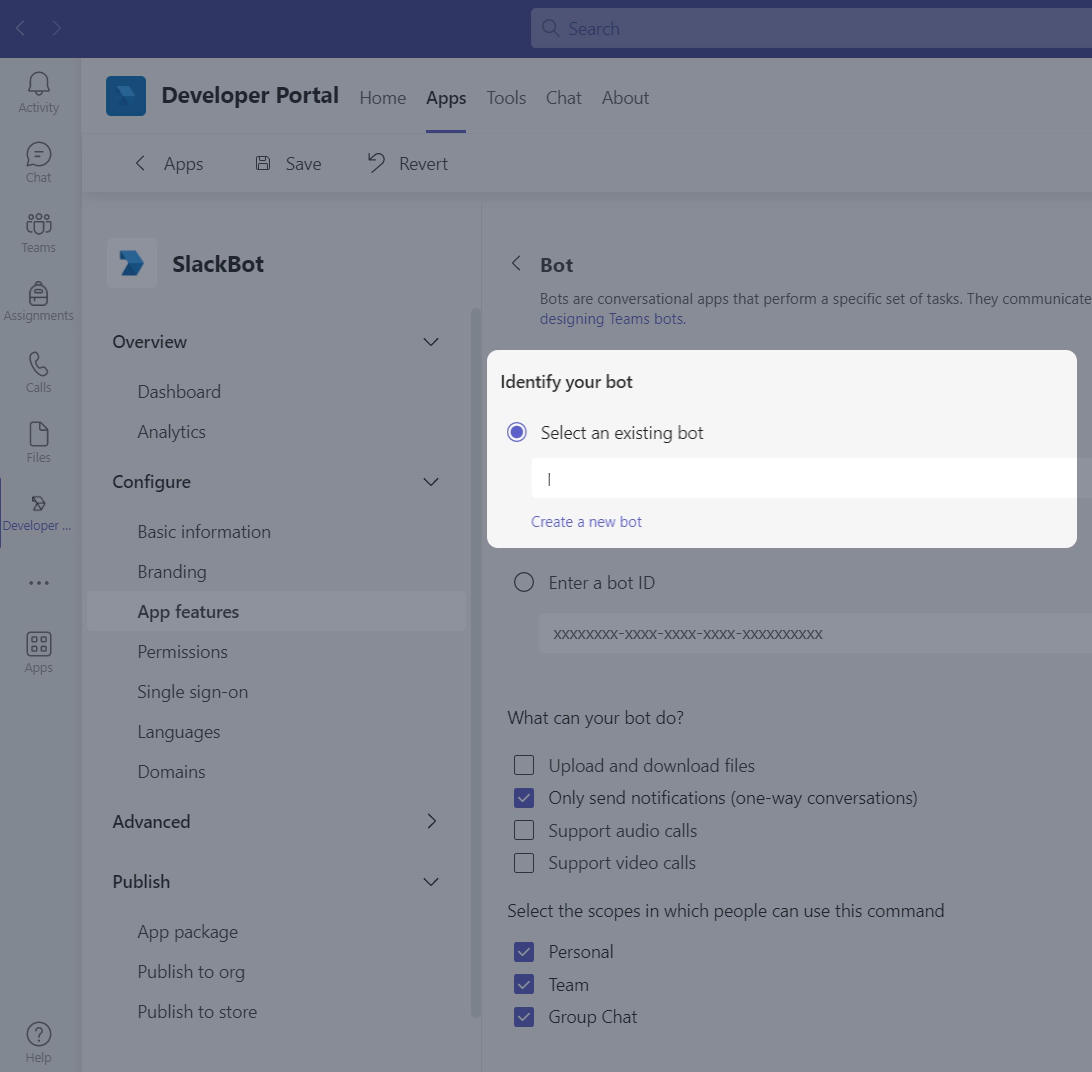
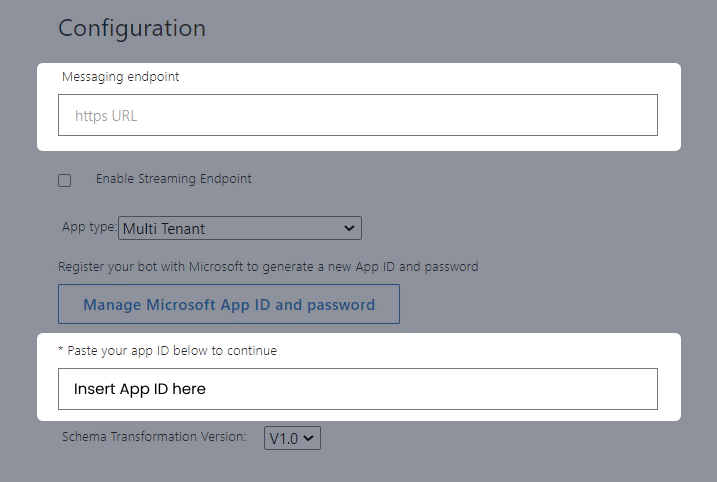
If you do not have a bot created already, follow these steps to create a new one. Also, make sure to save the password generated during the process. Keep the Messaging endpoint blank for the time being.
Step 3: Deploy the Bot
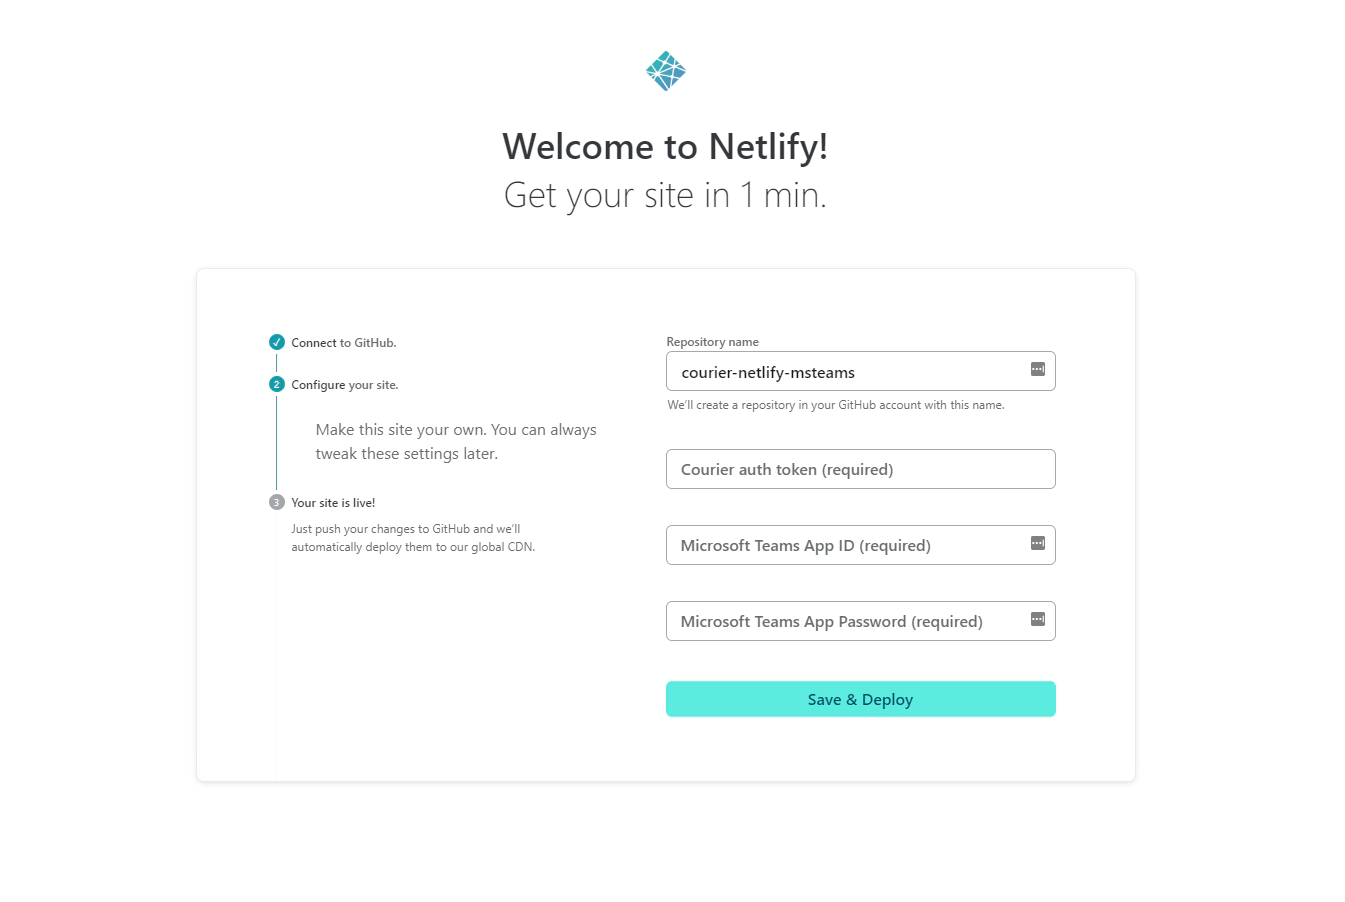
Before we can continue configuring and installing your bot, we must first deploy the code so we can create the messaging endpoint. For that, open the Microsoft Teams Bot Starter Repo and click the Deploy to Netlify button. There, you will have to connect to your GitHub account and enter your App ID (Bot ID), App Password, Courier Auth Token, and a name for the repo.
This will clone and deploy a starter Teams bot. Once the site is deployed, copy your site url. We'll need this to finish installing the bot. It should look like the following: https://{site-name}.netlify.app.
Once the site is deployed, copy your site URL since you need it to finish installing the bot.
Step 4: Install the Bot
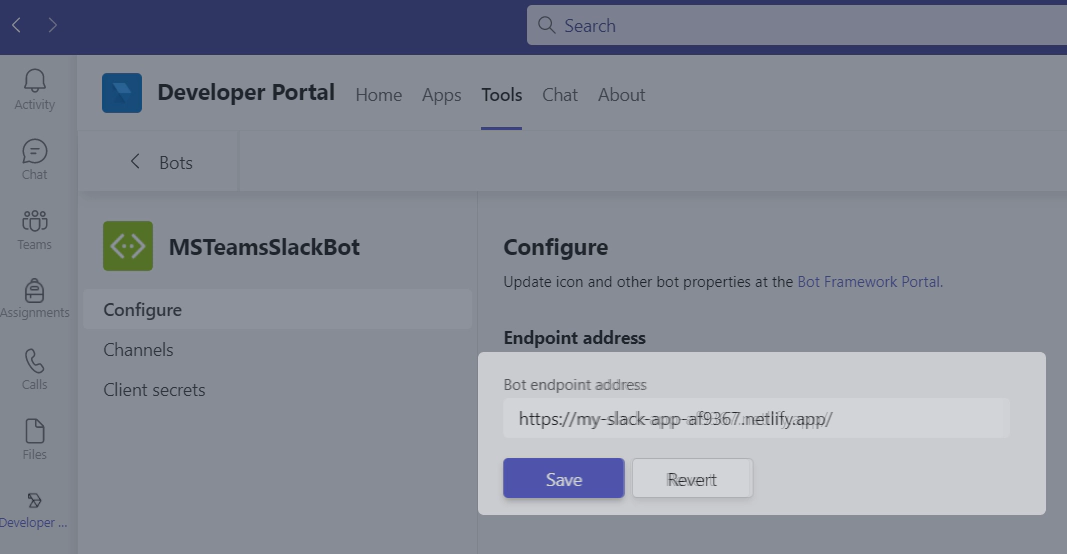
Now, go back to the Tools > Bot Management tab in Developer Portal and select the created bot to finalize the installation process. There, select the Configure option and copy the site URL to the Bot endpoint address field.
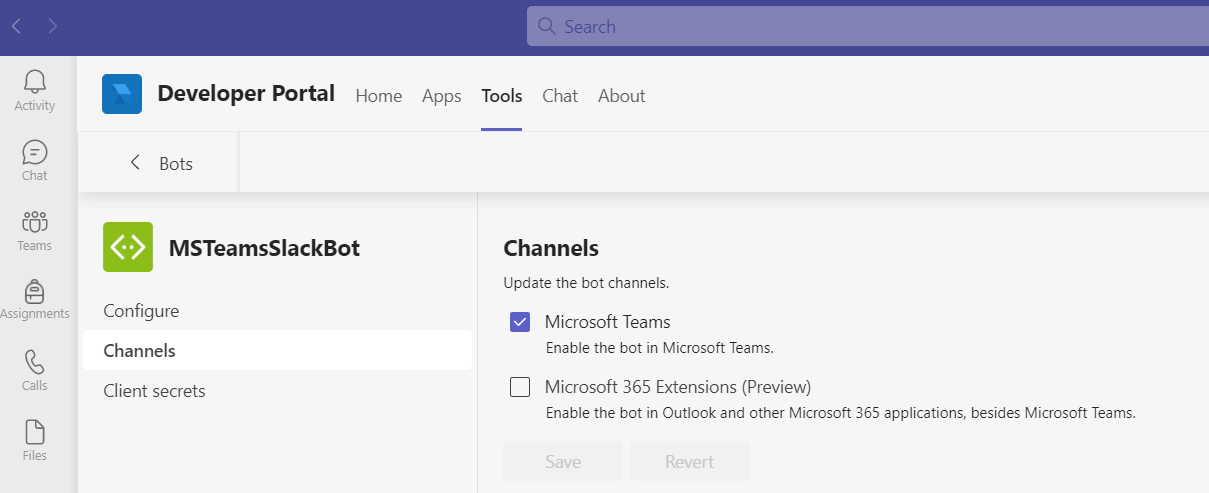
Then, select the Channels option from the left menu and tick the Microsoft Teams option.
Add the Microsoft Teams Integration
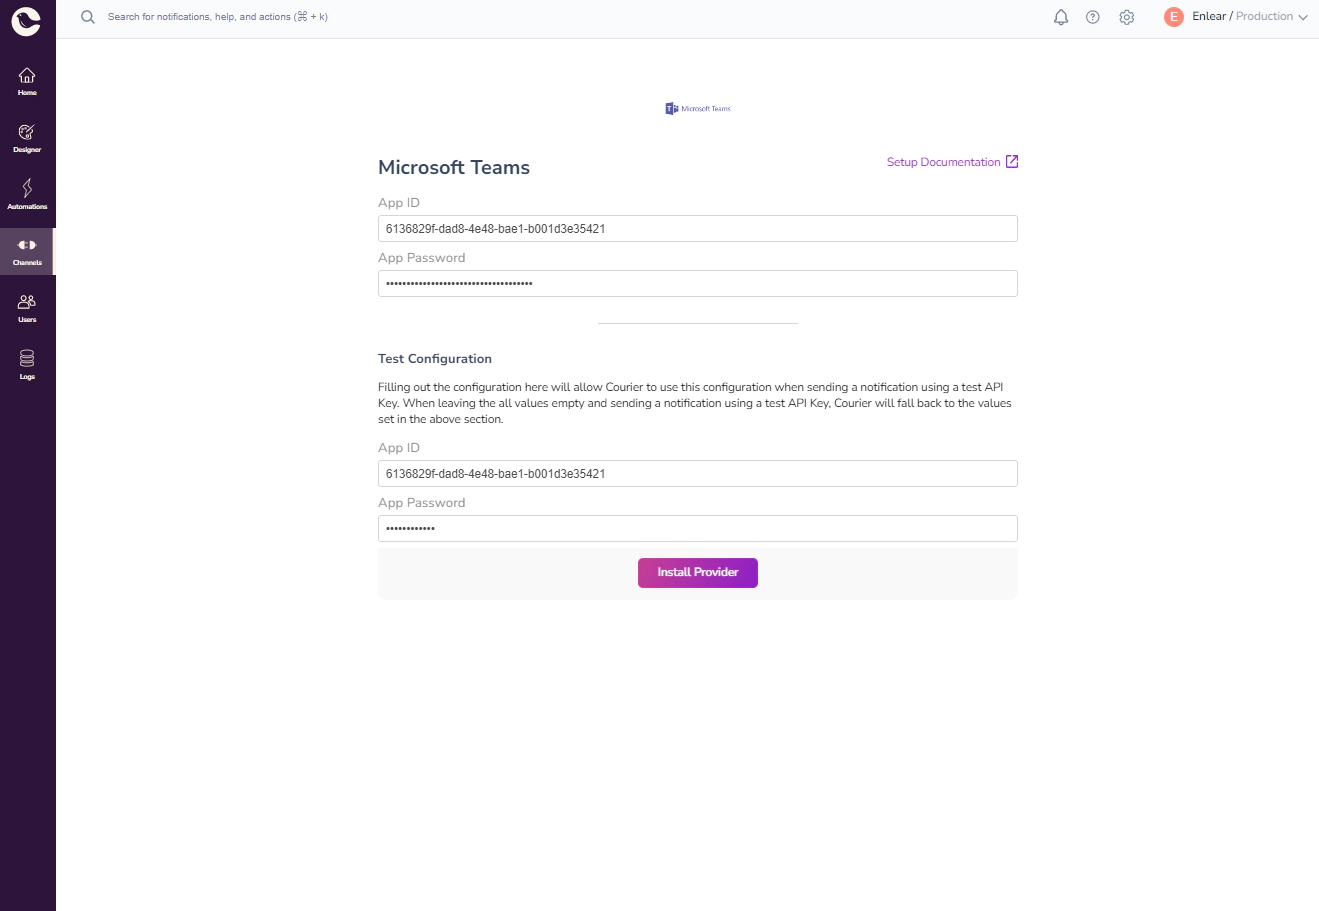
Now that we have a working Microsoft Teams bot, we can use the App ID and Password from above to configure the Microsoft Teams Integration in Courier.
Navigate to the Channels tab and select Microsoft Teams from the options. Enter the App ID, App Password and click the Install Provider button.
Create a Notification
Navigate to the Courier "Notifications" page and click Create Notification. Click on “Untitled Notification” to rename your notification — for this tutorial, call it “Test Appointment Reminder.” From your list of configured Integrations, click on the Microsoft Teams button.
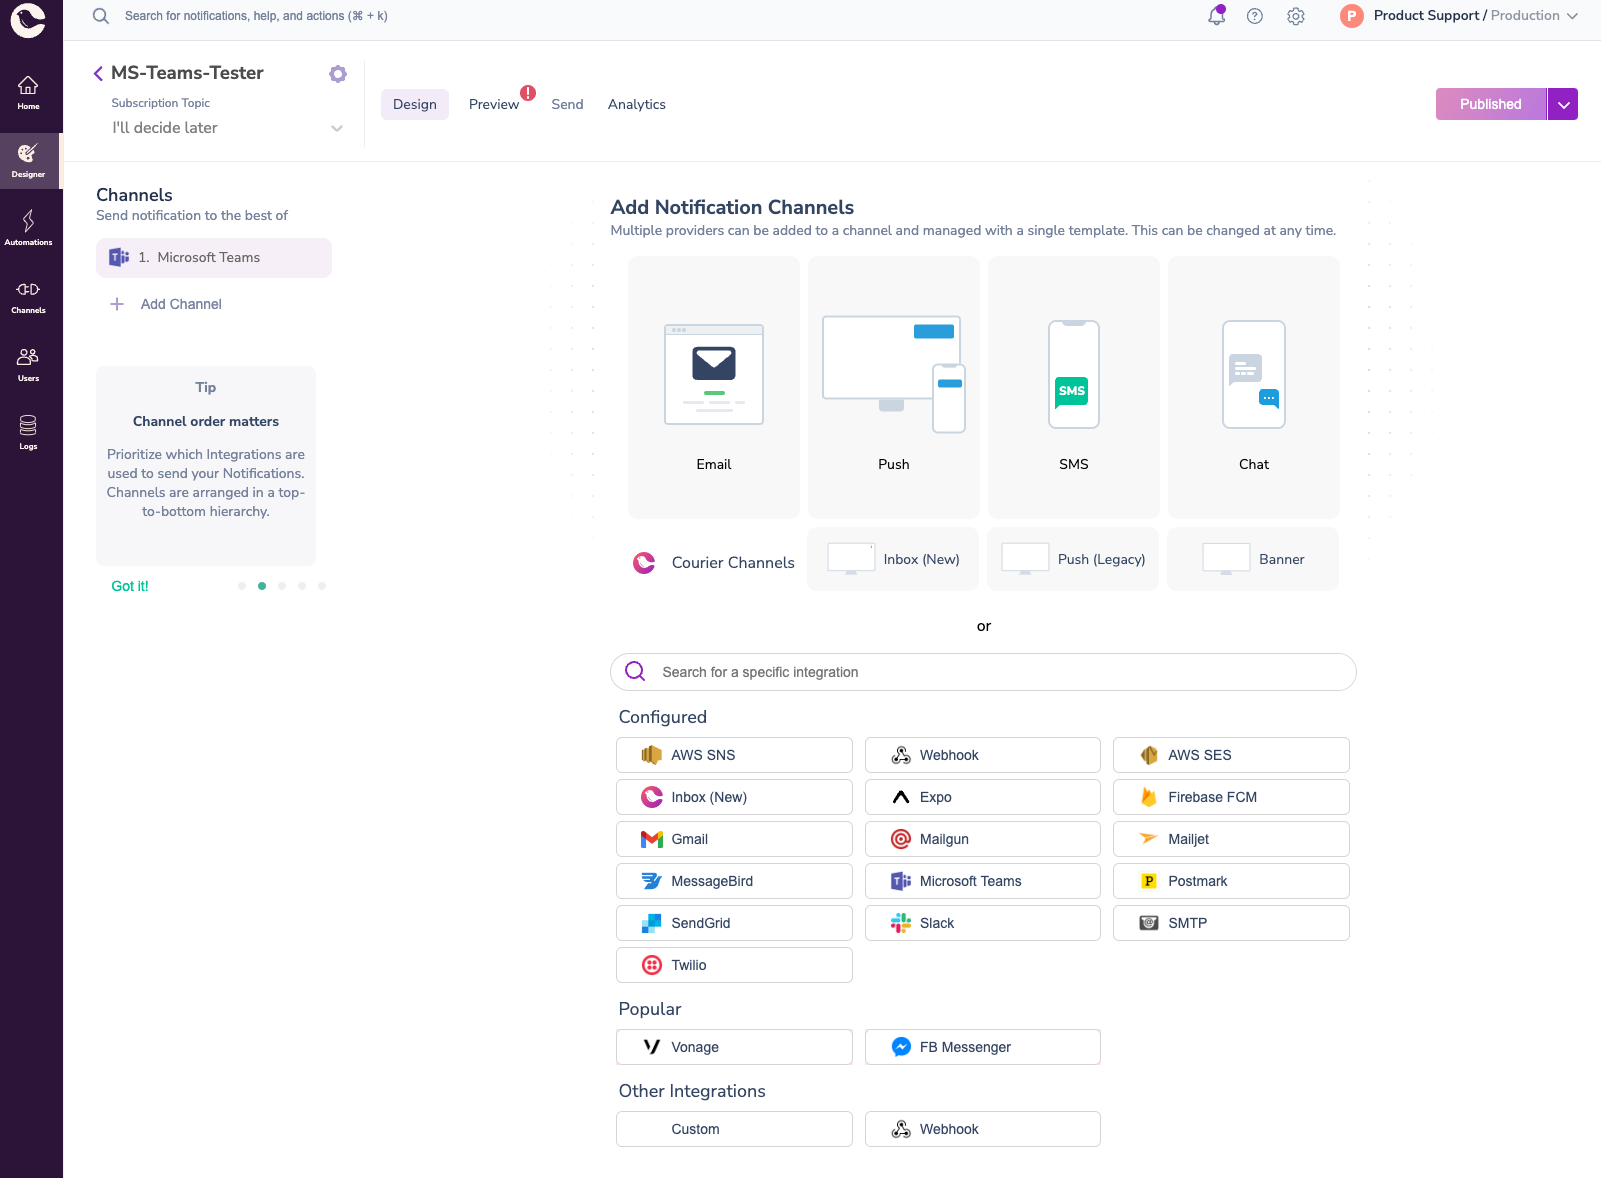
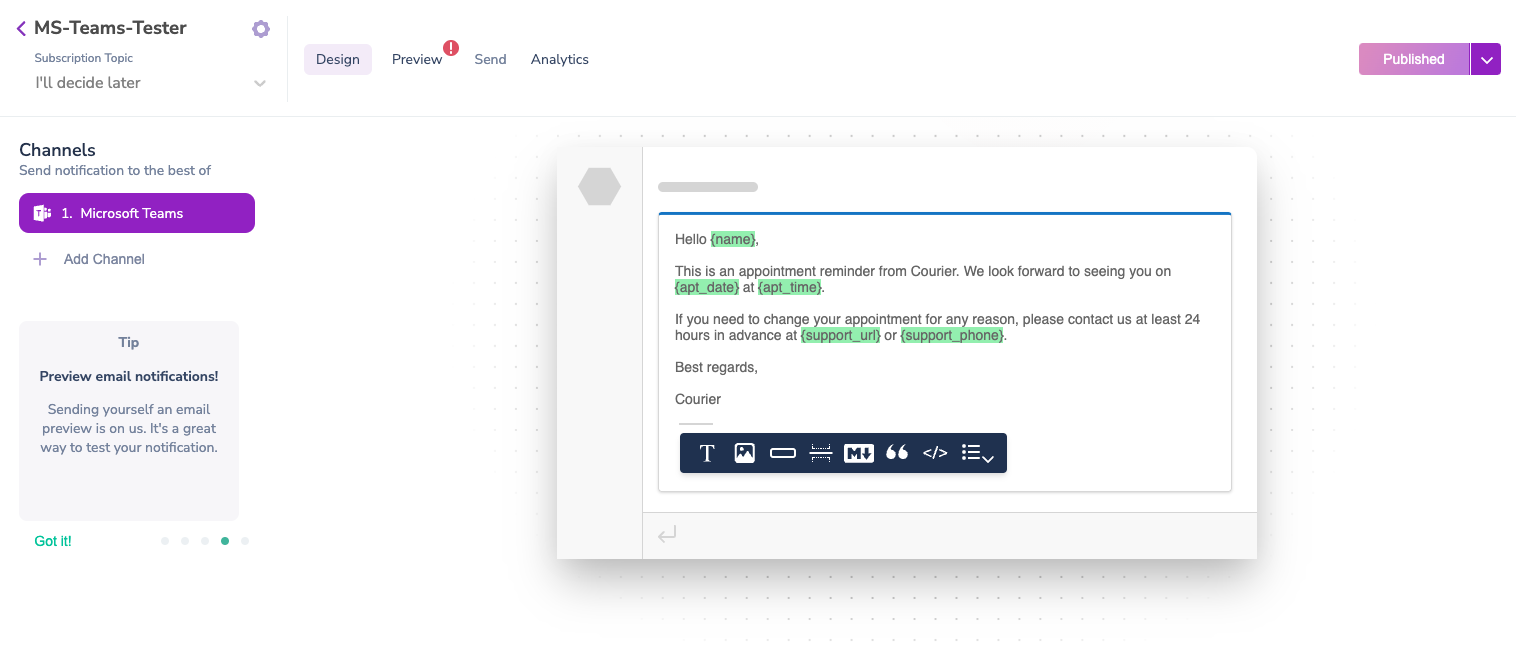
Then, click the Microsoft Teams tab that has been added to the sidebar in order to bring up a Microsoft Teams template.
Courier provides a visual template designer, so you can send notifications that are formatted professionally. You can add content blocks to the template by clicking appropriate icons. If you remove a content block, it is moved to your library in the sidebar and can be dragged back to the template if necessary.
These content blocks can include variables using a mustache-like template syntax. Surround text with a single set of curly braces and that text will be interpreted as a variable. For example, you may want to include a {name} variable.
For now, add a text block and fill it with whatever text you want to send. You can also copy the example below, which contains a few variables for demonstration.
Hello {name},

This is an appointment reminder from Courier. We look forward to seeing you on {apt_date} at {apt_time}.

If you need to change your appointment for any reason, please contact us at least 24 hours in advance at {support_url} or {support_phone}.

Best regards,

Courier
When you are finished, click Publish Changes in the upper right corner.
Preview your Notification With a Test Event
Courier allows you to preview your notifications using different Test Events so you can see how different data will affect the notification. Let's create a Test Event and preview the notification. We'll also use this Test Event when sending the message.
In the Notification Designer, click on the Preview tab at the top of the screen. Click the Create Test Event button. Give the event the name "Tutorial Example" and replace the provided JSON with the following:
{
  "data": {
    "name": "Spike Spiegel",
    "apt_date": "June 26",
    "apt_time": "8:44 PM",
    "support_phone": "202-555-0143",
    "support_url": "https://courier.com/docs"
  },
  "profile": {},
  "override": {}
}
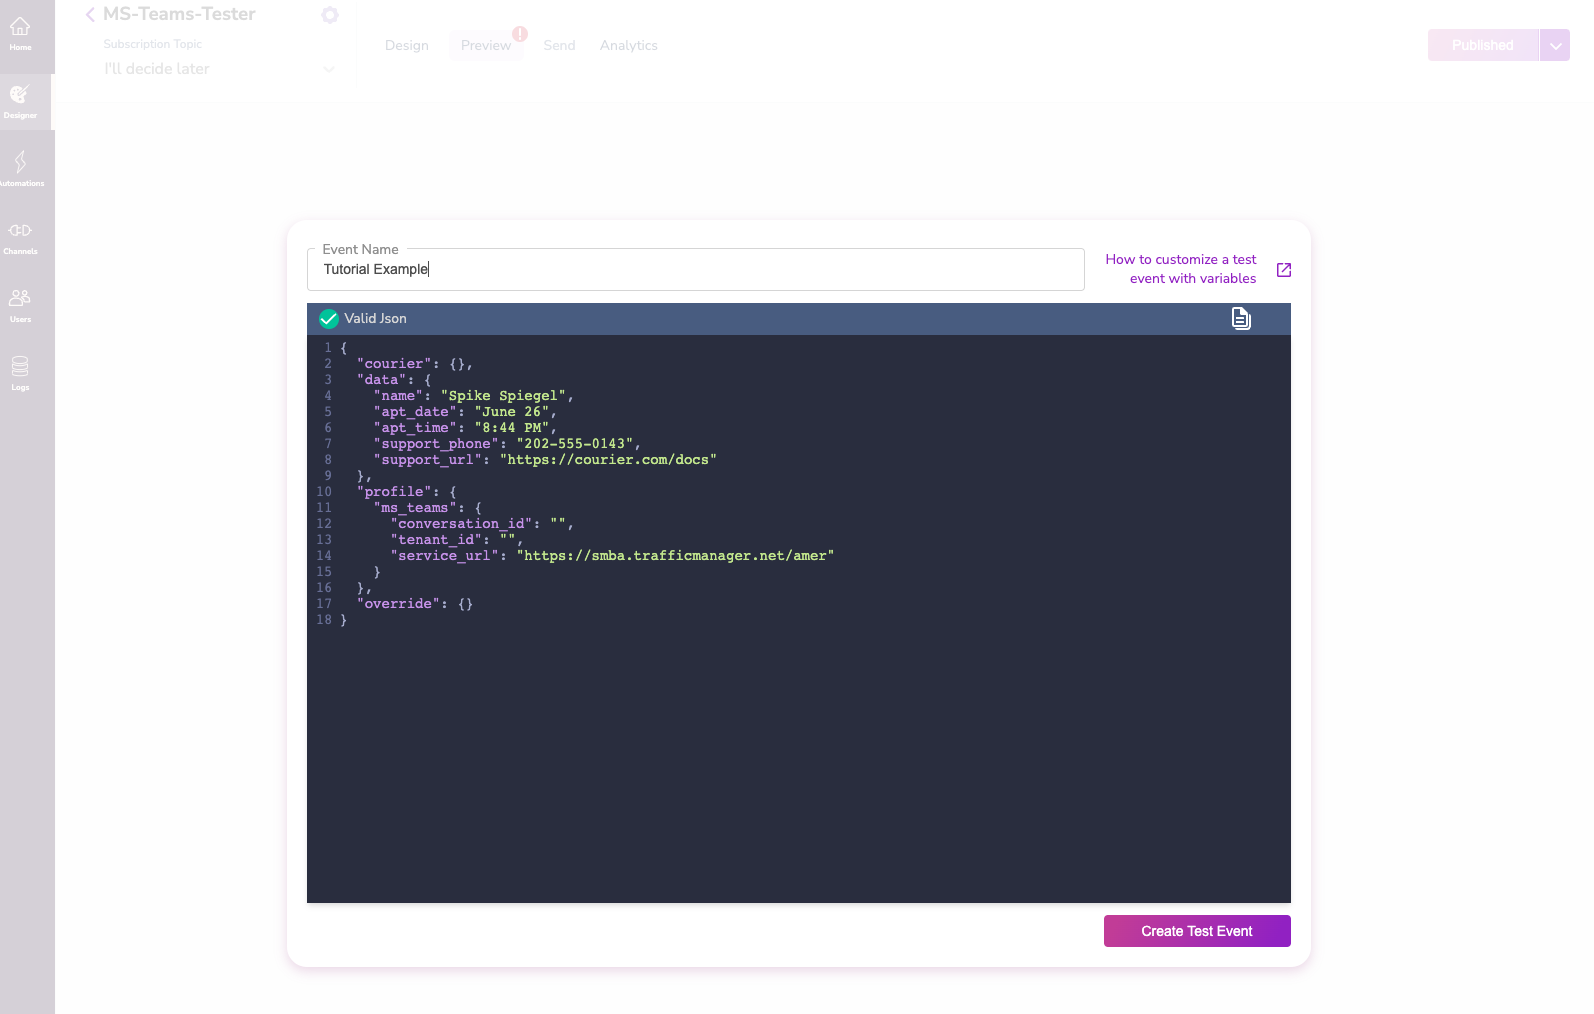
Click Create Test Event and you'll see a preview of the notification using the provided data for any variables used. Next, we'll use this test event to send the notification using the Send tab.
Send a Message
Courier passes messages to Integrations via the Send endpoint. For this tutorial, we will send our messages using the Send tab in the Notification Designer. It will also provide you with sample code for your preferred language using one of our SDKs.
Click the Send tab at the top of the page.

Send a Direct Message
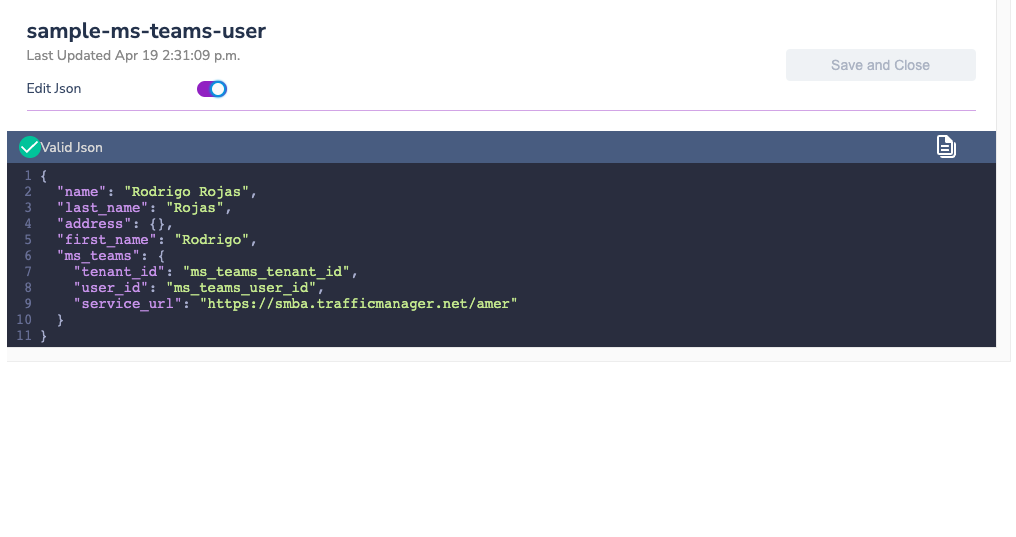
To send a direct message to a Microsoft Teams user, we'll need a Courier Recipient Profile configured with a Microsoft Teams object that includes a user_id, tenant_id, conversation_id, and service_url.
Send to a Channel
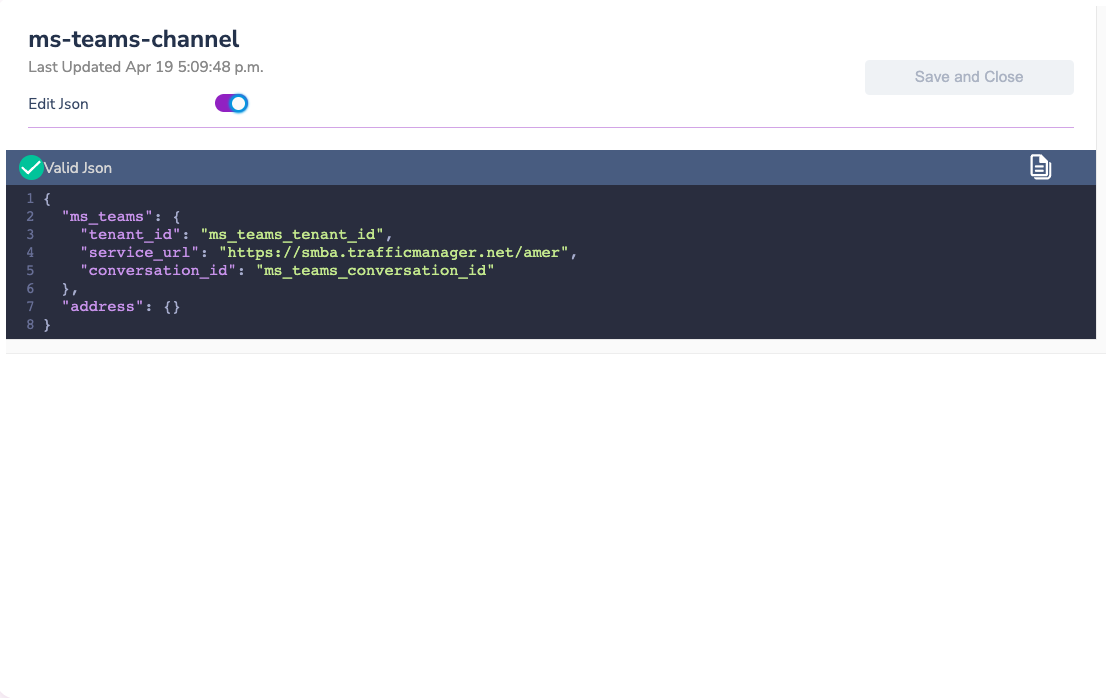
To send a message to a Microsoft Teams channel, we'll need a Courier Recipient Profile with a Microsoft Teams object that includes a channel_id, tenant_id, and service_url.
Congratulations, you have successfully sent notifications to a Microsoft Teams user and channel. You are welcome to further develop this starter bot to fit your needs and distribute it to other Microsoft Teams tenants.
The bot we are using works great for this guide, but likely won't fit a production use case. You'll want to update the Activity Handler to cover other events like when the bot is installed within an organizational unit. Check out Event-driven conversations using an activity handler.
Profile Requirements
With Microsoft Teams, Courier can send a message to either Users that are part of a tenant or the Channel.
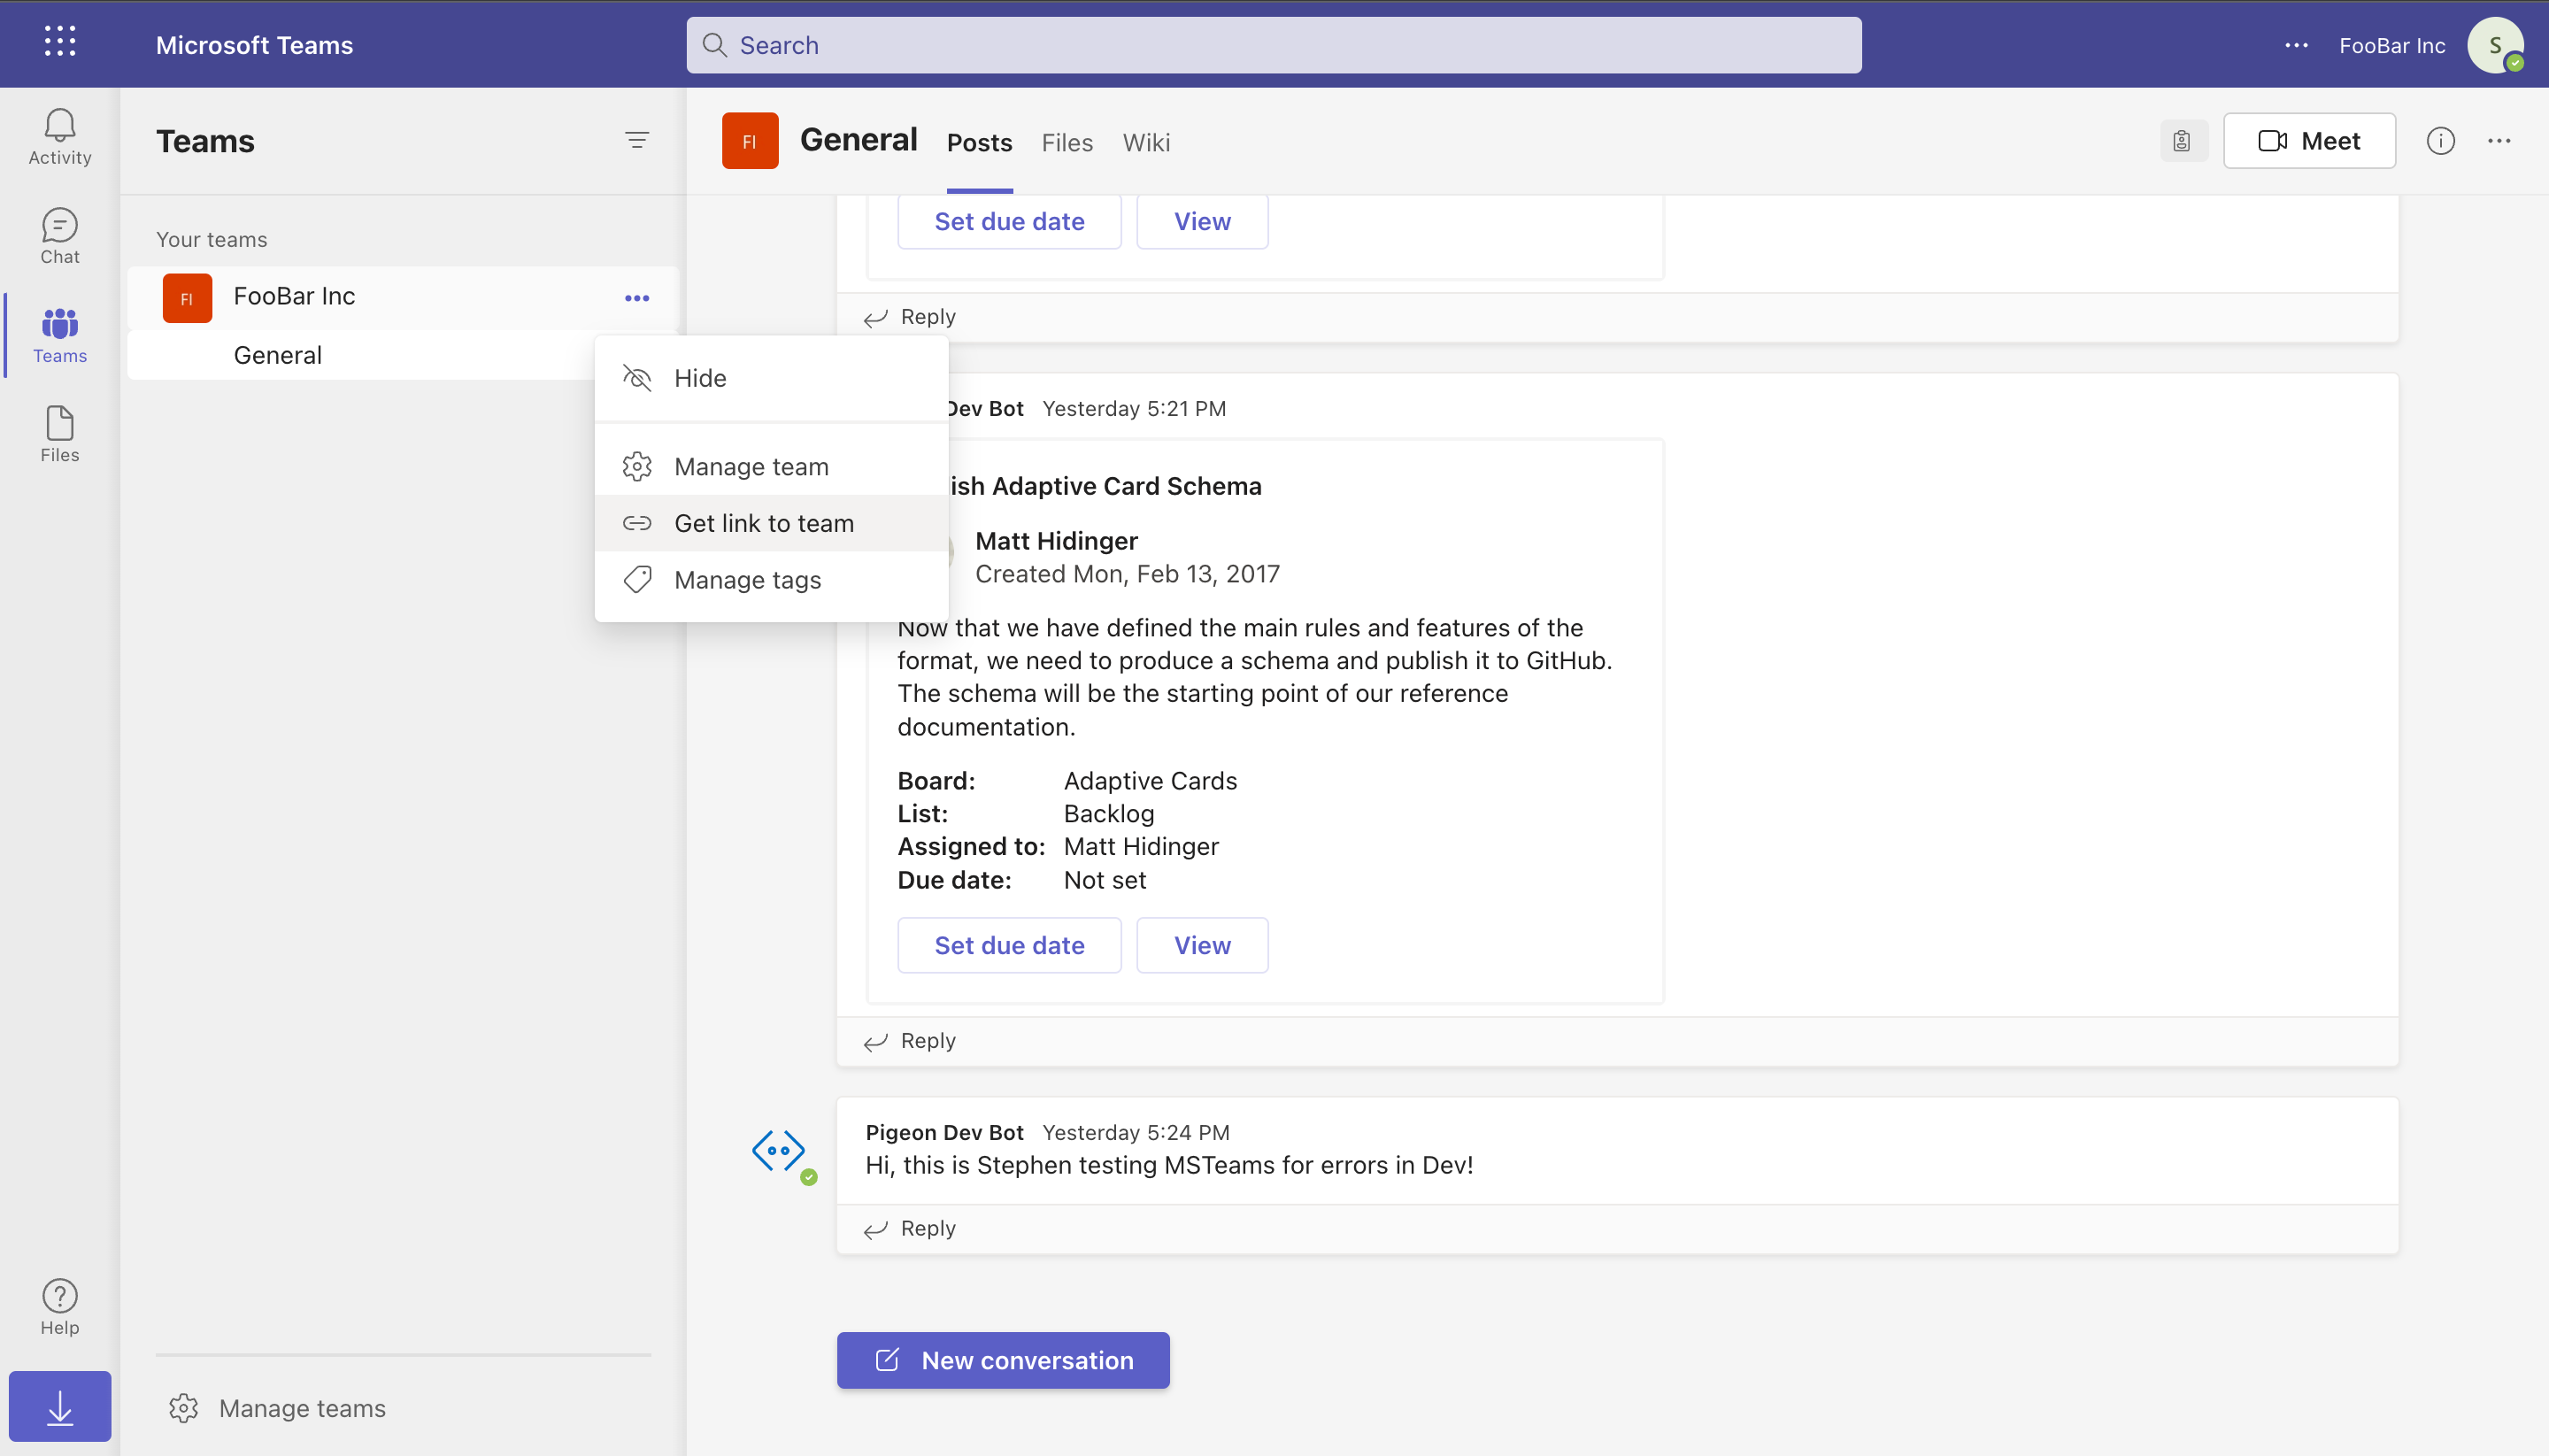
To locate your tenant_id, you can navigate to https://teams.microsoft.com/?tenantId and copy the value from the redirected url tenantId query parameter. If the parameter doesn't show up in the url, click the three dots next to your Team and click Get link to team to find a link with the tenantId parameter.
Send a Message to a Microsoft Teams User
To deliver a message to a recipient over Microsoft Teams, Courier must be provided with the ID of the intended recipient user_id, the tenant ID for the Microsoft Teams account that recipient is a user of tenant_id, and the service URL associated with that Microsoft Teams tenant service_url.
You can follow the steps in this Microsoft Teams article in order to fetch the roster or user profile for your bot. To retrieve the authentication token, make the call in step 1 of this Microsoft Teams article.
{
  "message": {
    // Recipient Profile
    "to": {
      "ms_teams": {
        "user_id": "",
        "tenant_id": "",
        "service_url": "https://smba.trafficmanager.net/amer"
      }
    }
  }
}
For sending a message using either email or channel_name, your bot must have following permissions:
- ChannelSettings.Read.All (requires admin consent)
- TeamSettings.Read.All (requires admin consent)
- User.Read.All
This allows Courier to fetch the user's user_id or channel_id using the Microsoft Graph API.
You can also send a message to a user by using the email field in the ms_teams object. This will send a message to the user's email address.
{
  "message": {
    // Recipient Profile
    "to": {
      "ms_teams": {
        "email": "<user_email>",
        "tenant_id": "<tenant_id>"
      }
    }
  }
}
Send a Message to a Microsoft Teams Channel
To deliver a message to a channel over Microsoft Teams, Courier must be provided with the ID of the channel and the service URL associated with that Microsoft Teams tenant.
To locate the conversation_id open Microsoft Teams in the browser and use the threadId query parameter from the url.
// Recipient Profile
{
  "message": {
    "to": {
      "ms_teams": {
        "conversation_id": "",
        "tenant_id": "",
        "service_url": "https://smba.trafficmanager.net/amer"
      }
    }
  }
}
Send a Message to a Microsoft Teams Channel by Name
You can also send a message to a channel by using the channel_name field in the ms_teams object. This will send a message to the channel with the provided name.
{
  "message": {
    // Recipient Profile
    "to": {
      "ms_teams": {
        "team_id": "<team_id>",
        "channel_name": "<channel_name>",
        "tenant_id": "<tenant_id>"
      }
    }
  }
}
If you are located in the Americas Region, the service url is https://smba.trafficmanager.net/amer.
Overrides
Overrides can be used to change the App ID and App Password of an Azure Bot. Below is an example of overriding the ID and password:
{
  "message": {
    "template": "<COURIER_NOTIFICATION_ID>",
    "to": {
      "ms_teams": {
        "user_id": "a-user-id",
        "tenant_id": "a-tenant-id-or-group-id",
        "service_url": "https://smba.trafficmanager.net/amer"
      }
    },
    "data": {
      "name": "Katherine Pryde"
    },
    "providers": {
      "msteams": {
        "override": {
          "config": {
            "appId": "<App ID>",
            "appPassword": "<App Password>"
          }
        }
      }
    }
  }
}
MS Teams Adaptive Cards
Courier supports Jsonnet blocks for MS Teams Adaptive Cards in the Template Designer.
Please note that Jsonnet blocks currently only work with v2 of Courier's Send API. If you'd like Jsonnet block features enabled, please contact support.
Using Jsonnet Blocks
Courier Jsonnet blocks lets users design the look of their MS Teams Adaptive Cards. In the following steps, we'll make an example adaptive card and use the Send API to post to MS Teams with our bot.
In the designer, create a new MS Teams channel and add a Jsonnet block:
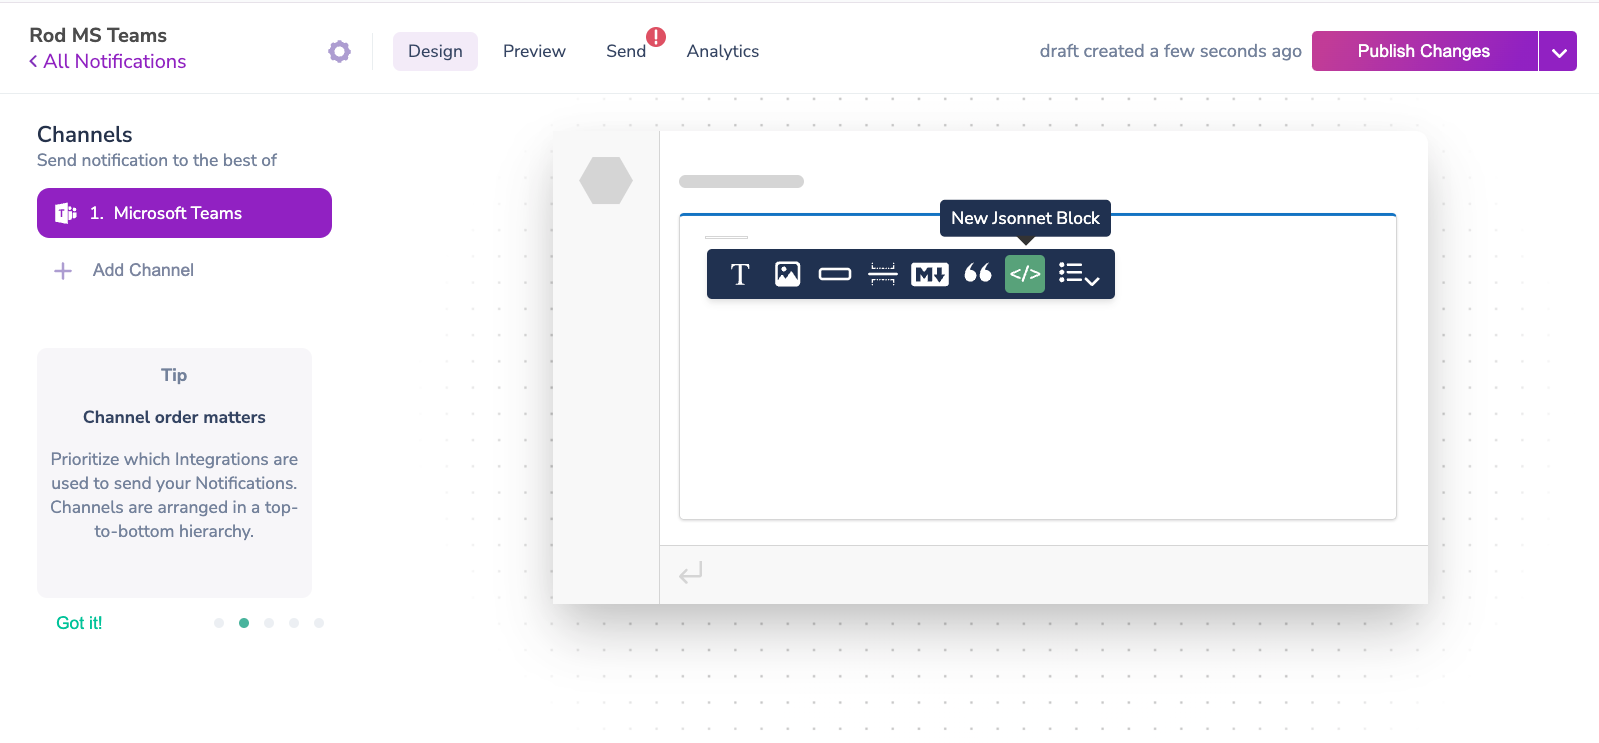
Microsoft has an Adaptive Cards Designer with a template we can use for this example. Copy the code from the "Card Payload Editor" into the Jsonnet block:

Send an Adaptive Card to an MS Teams Channel
Be sure to include the sample data from the Sample Data Editor in your send request:
{
  "message": {
    "to": {
      "user_id": "QUICKSTART_USER"
    },
    "template": "TGAV18XGBAM565JHKFZY3SJYZB52",
    "data": {
      "title": "Publish Adaptive Card Schema",
      "description": "Now that we have defined the main rules and features of the format, we need to produce a schema and publish it to GitHub. The schema will be the starting point of our reference documentation.",
      "creator": {
        "name": "Matt Hidinger",
        "profileImage": "https://pbs.twimg.com/profile_images/3647943215/d7f12830b3c17a5a9e4afcc370e3a37e_400x400.jpeg"
      },
      "createdUtc": "2017-02-14T06:08:39Z",
      "viewUrl": "https://adaptivecards.io",
      "properties": [
        {
          "key": "Board",
          "value": "Adaptive Cards"
        },
        {
          "key": "List",
          "value": "Backlog"
        },
        {
          "key": "Assigned to",
          "value": "Matt Hidinger"
        },
        {
          "key": "Due date",
          "value": "Not set"
        }
      ]
    }
  }
}
The user_id for this example has an ms_teams object with a conversation_id already configured in the user profile. Make sure you have this configured otherwise you'll receive a 400 bad request error. Once the request is sent, the MS Teams channel will render the following adaptive card:
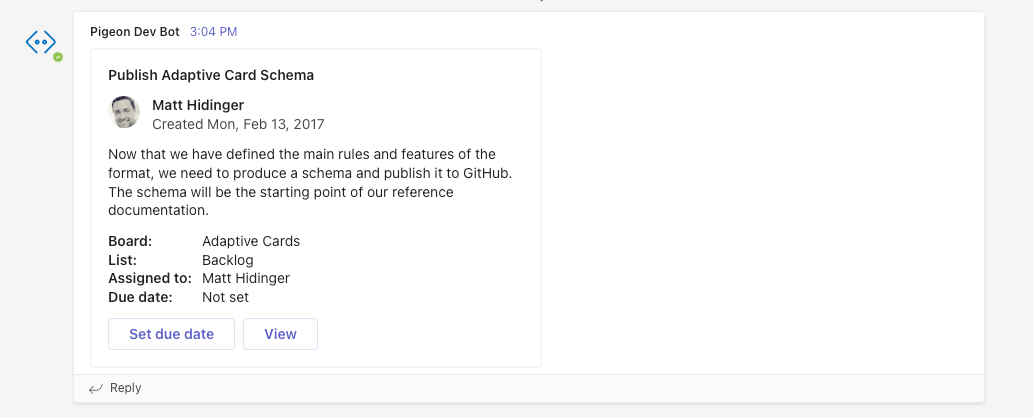
Congratulations, You can now send Adaptive Cards to MS Teams!
MS Teams @ Mentions in Adaptive Cards
To include a mention in an Adaptive Card you need to include the following elements:
- A
<at>username</at>in the JSONNET block. - The
mentionedobject inside of an MS Teams property in the card content that includes the MS Teams useridof the user being mentioned.
A sample mention will follow this template inside:
{
  "msteams": {
    "entities": [
      {
        "type": "mention",
        "text": "<at>John Doe</at>",
        "mentioned": {
          "id": "29:123124124124",
          "name": "John Doe"
        }
      }
    ]
  }
}