Okta Integration
Introduction
This guide will walk you through the steps necessary to allow your team to sign in to Courier with Okta.
Prerequisites
- An Okta account with Admin privileges.
- Each user must be invited to courier via email before they can log in with Okta.
- Some of these steps require information to be received from and sent to courier. Before continuing, contact Courier support and ask for assistance in setting up Okta Sign in.
Create the App Integration in Okta
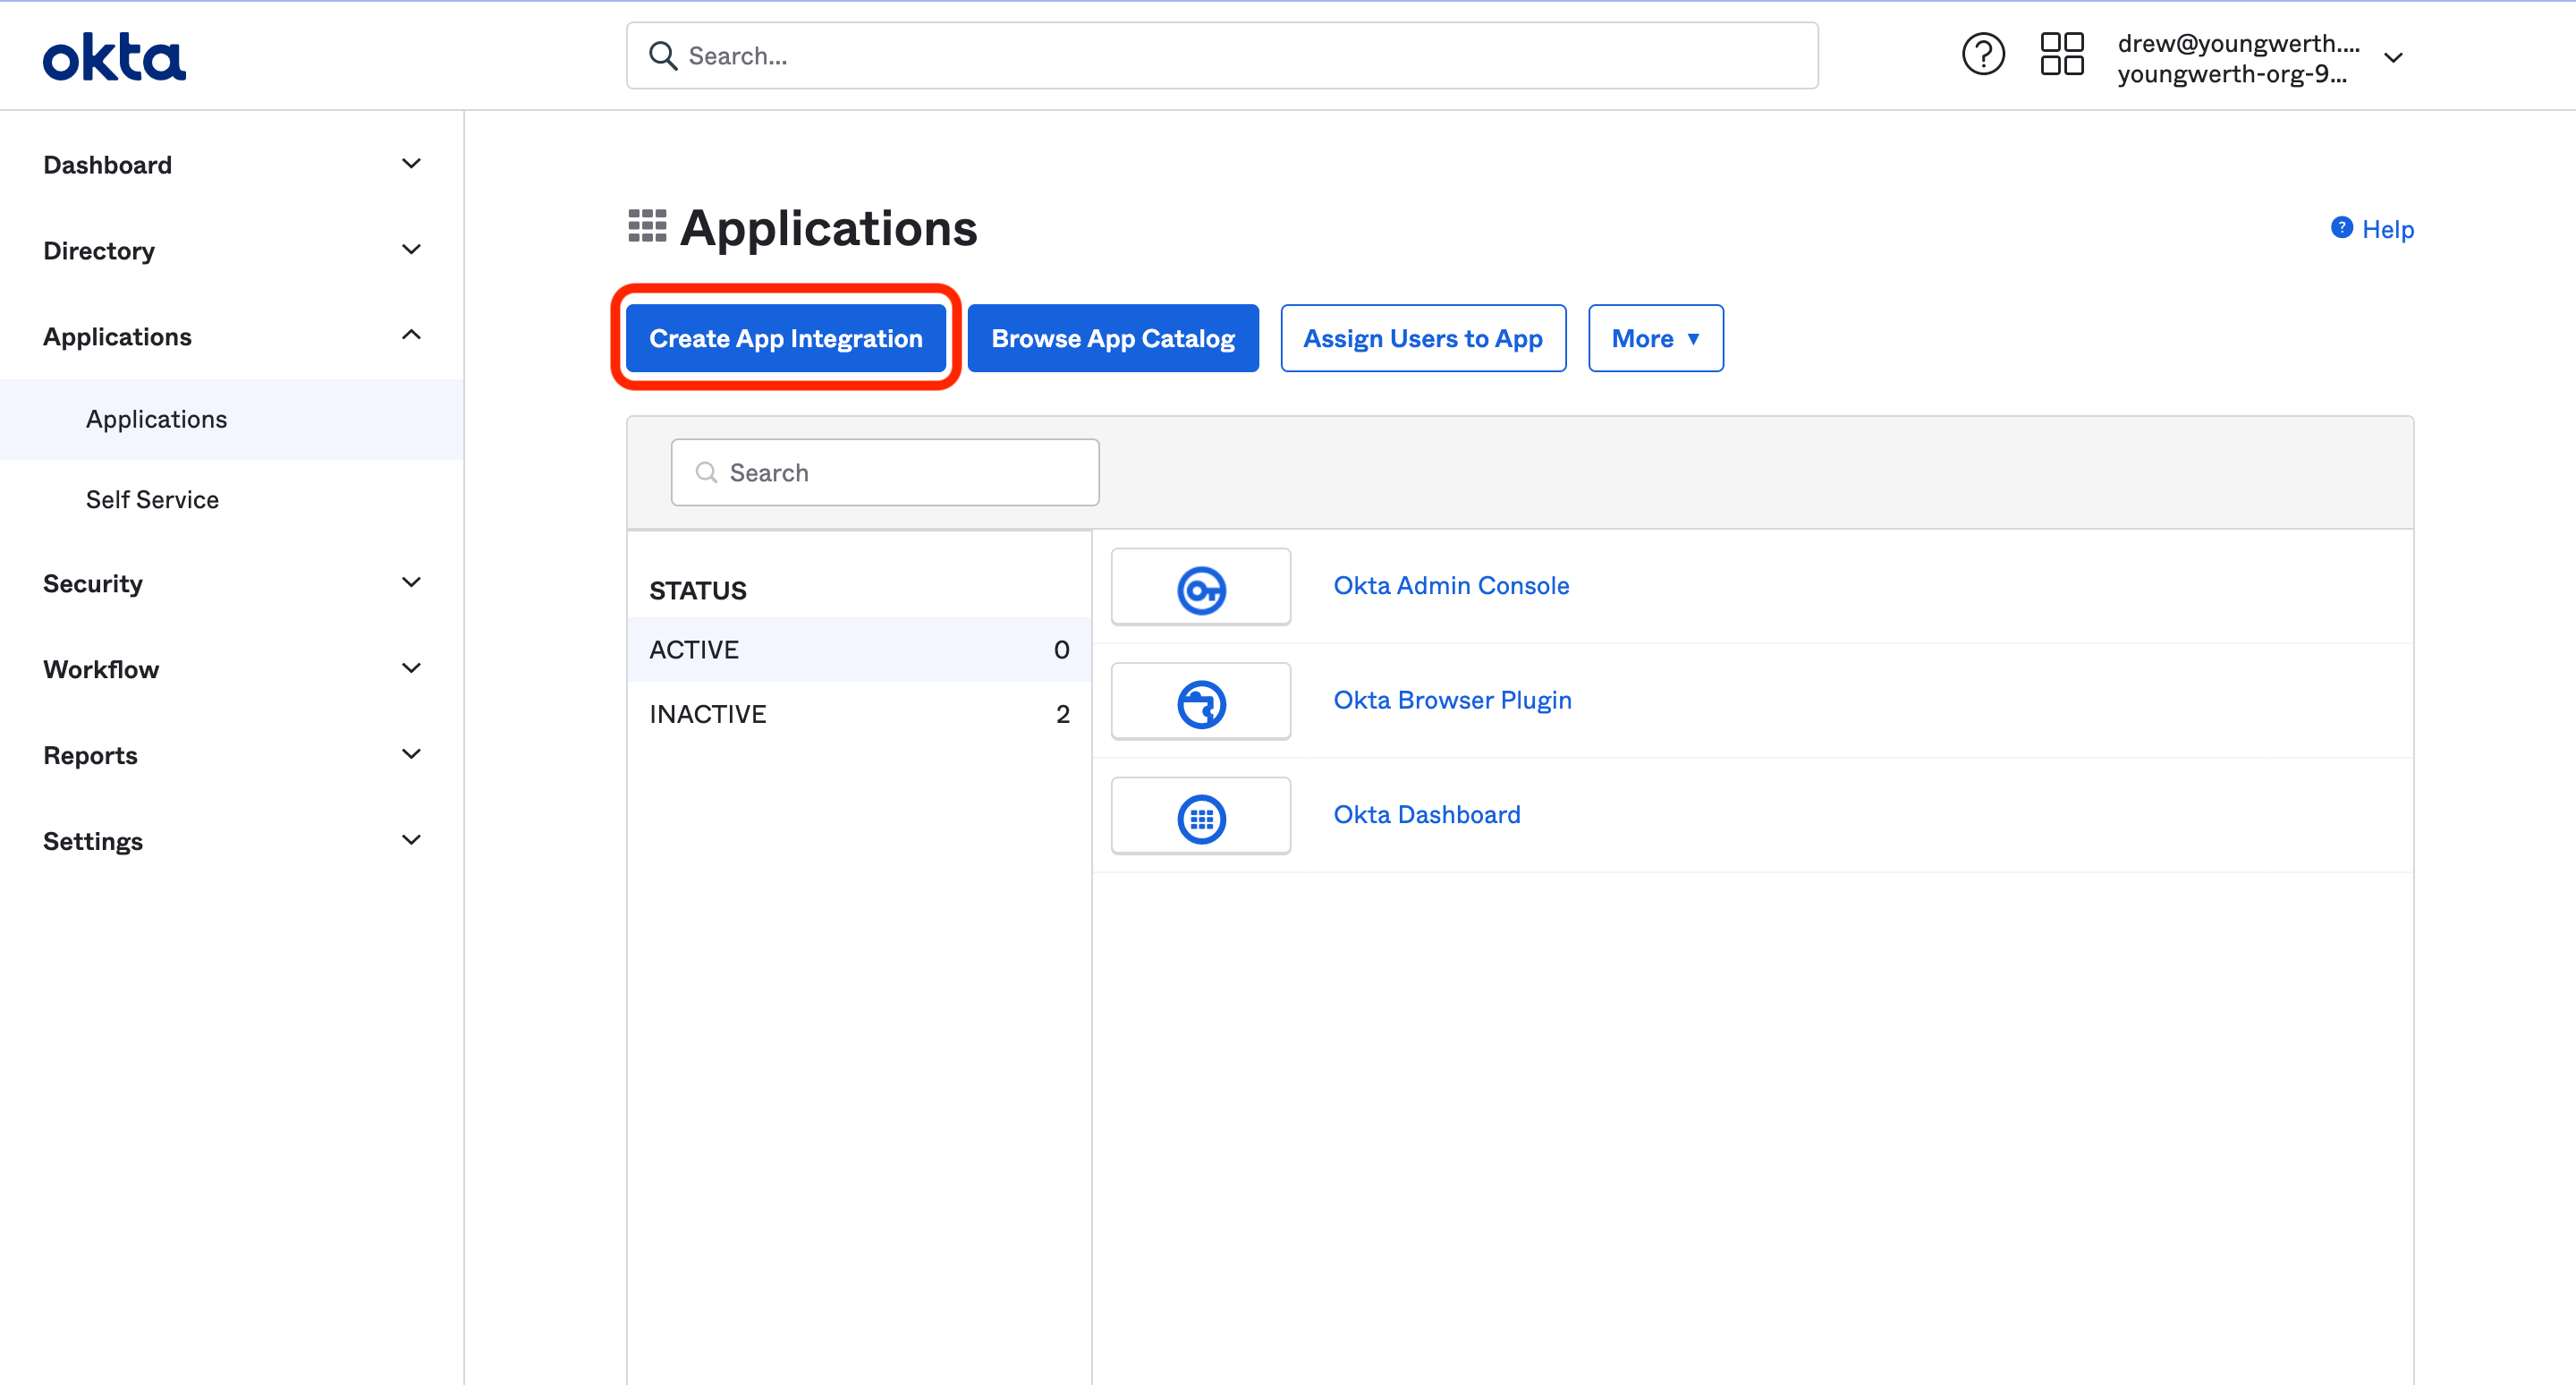
- Navigate to the Applications > Applications section of the Okta admin panel
- Hit the "Create App Integration Button":
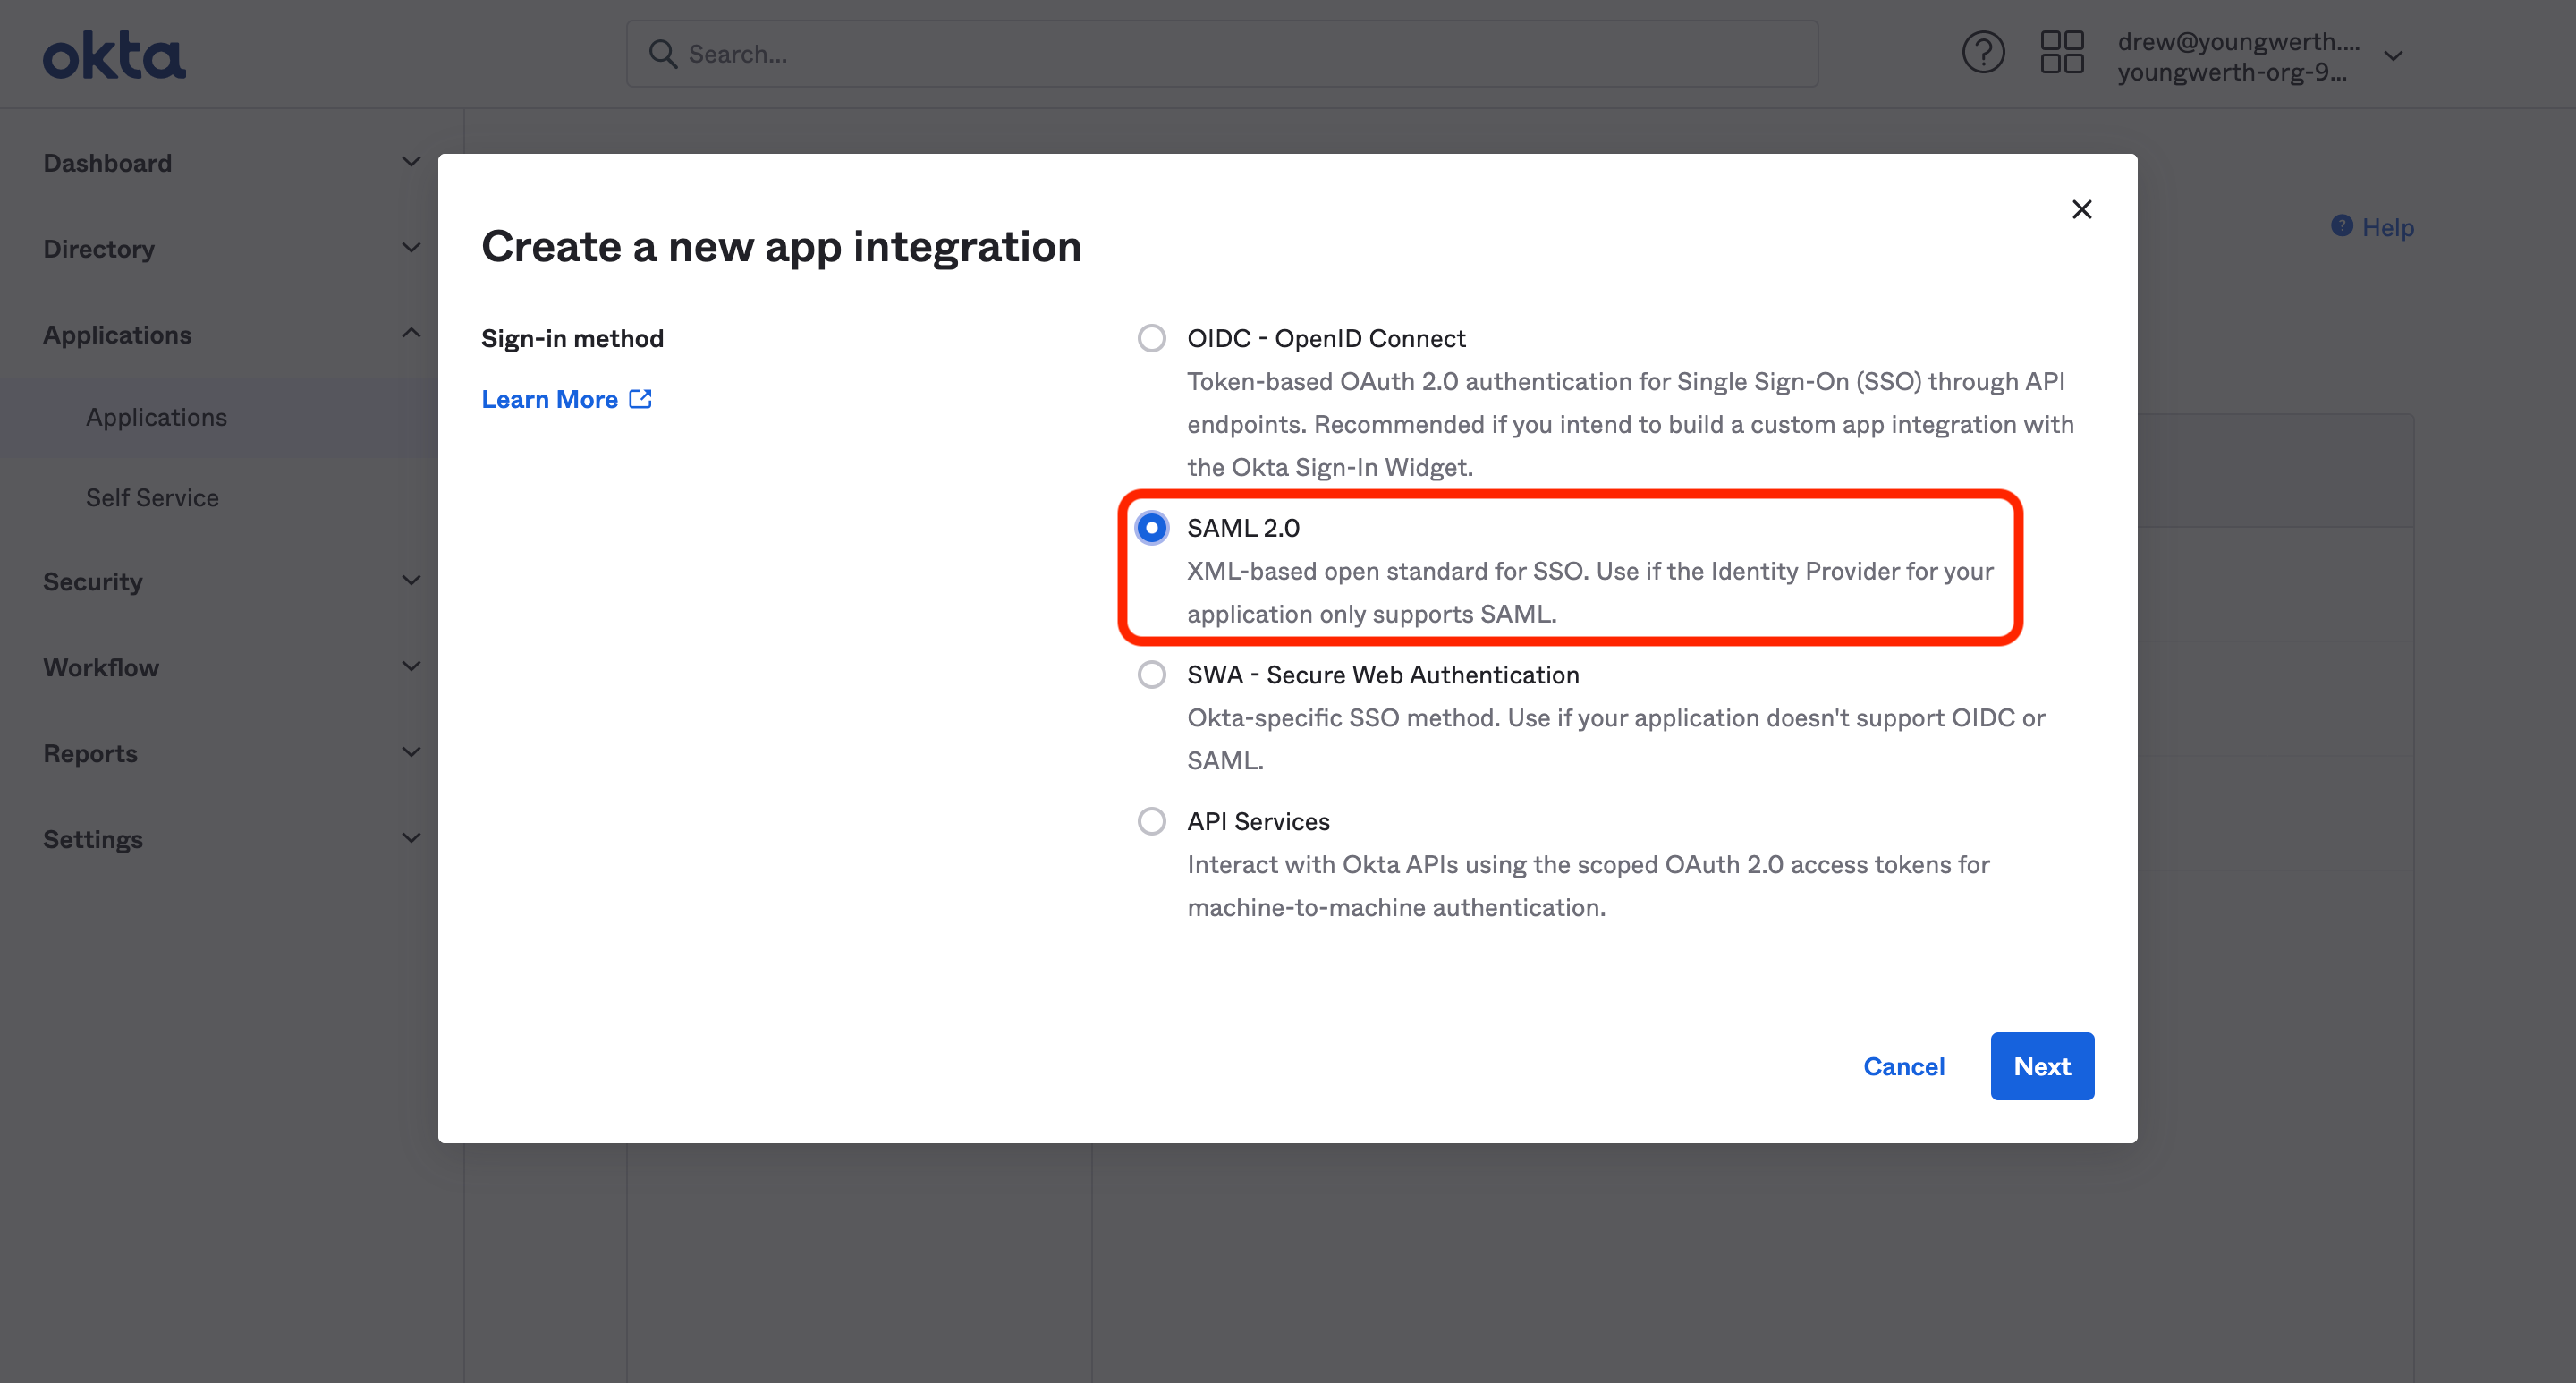
- Select SAML 2.0 and hit "Next"
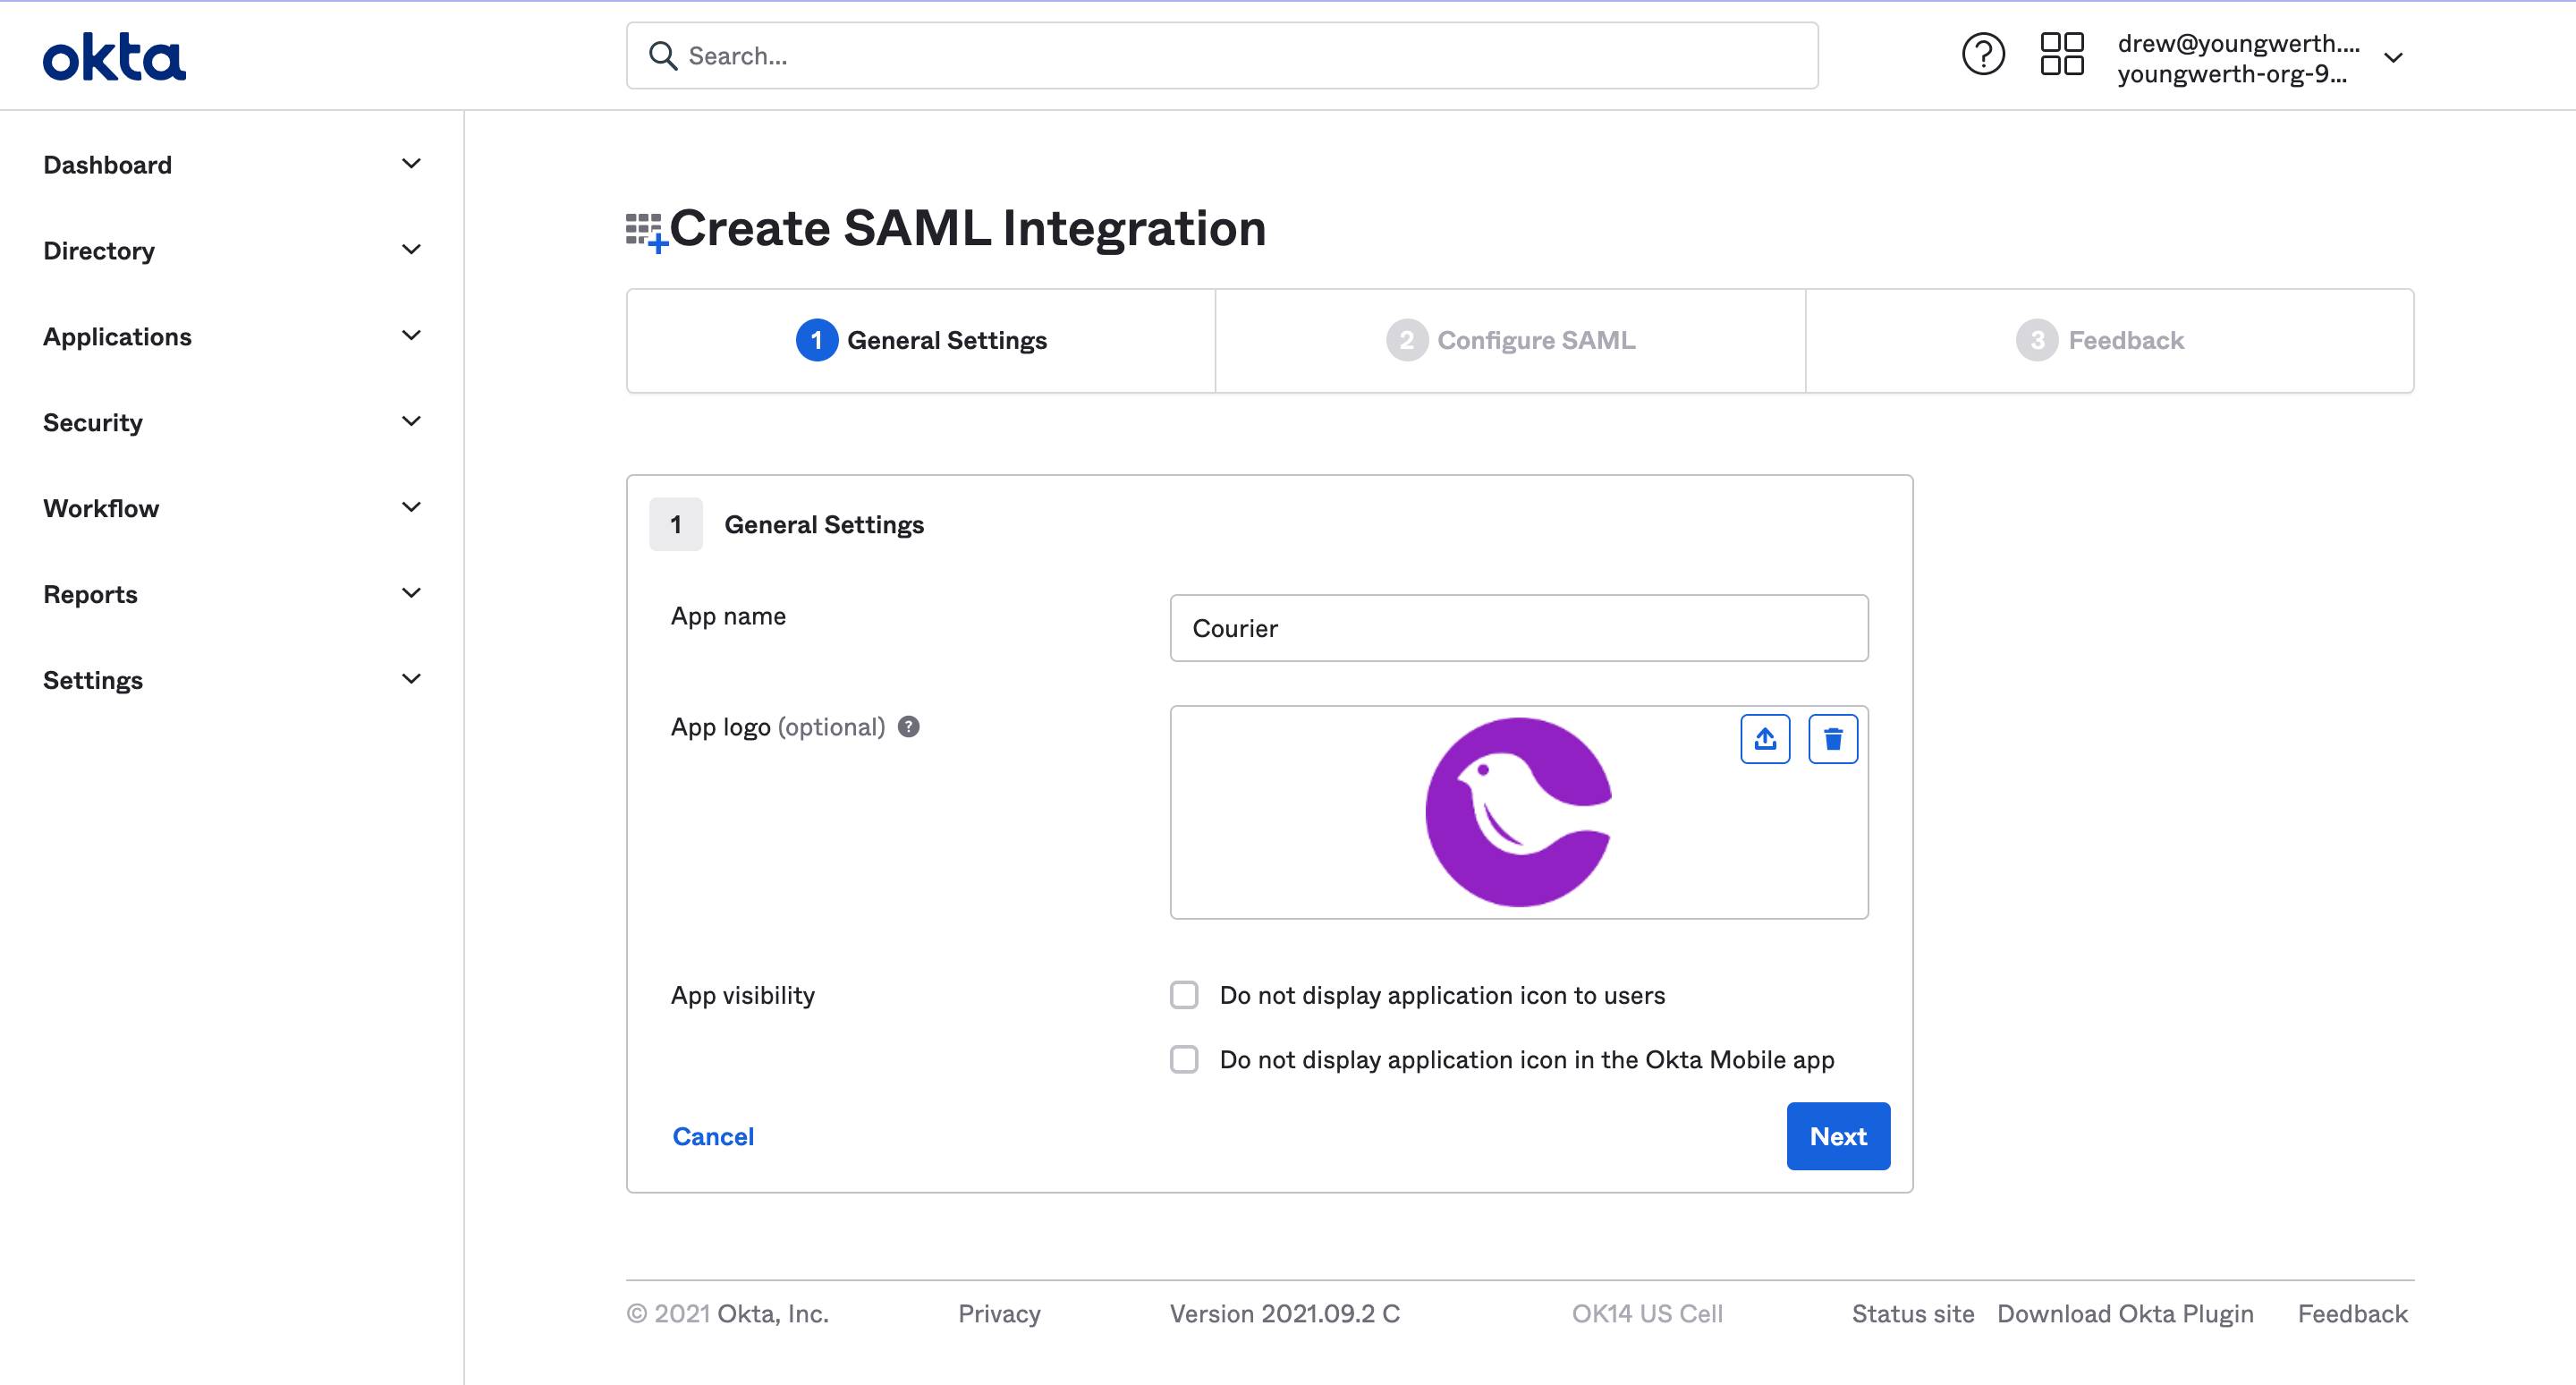
- Enter
Courieras the app name and optionally provide the Courier logo (available after the screenshot) then click "Next"
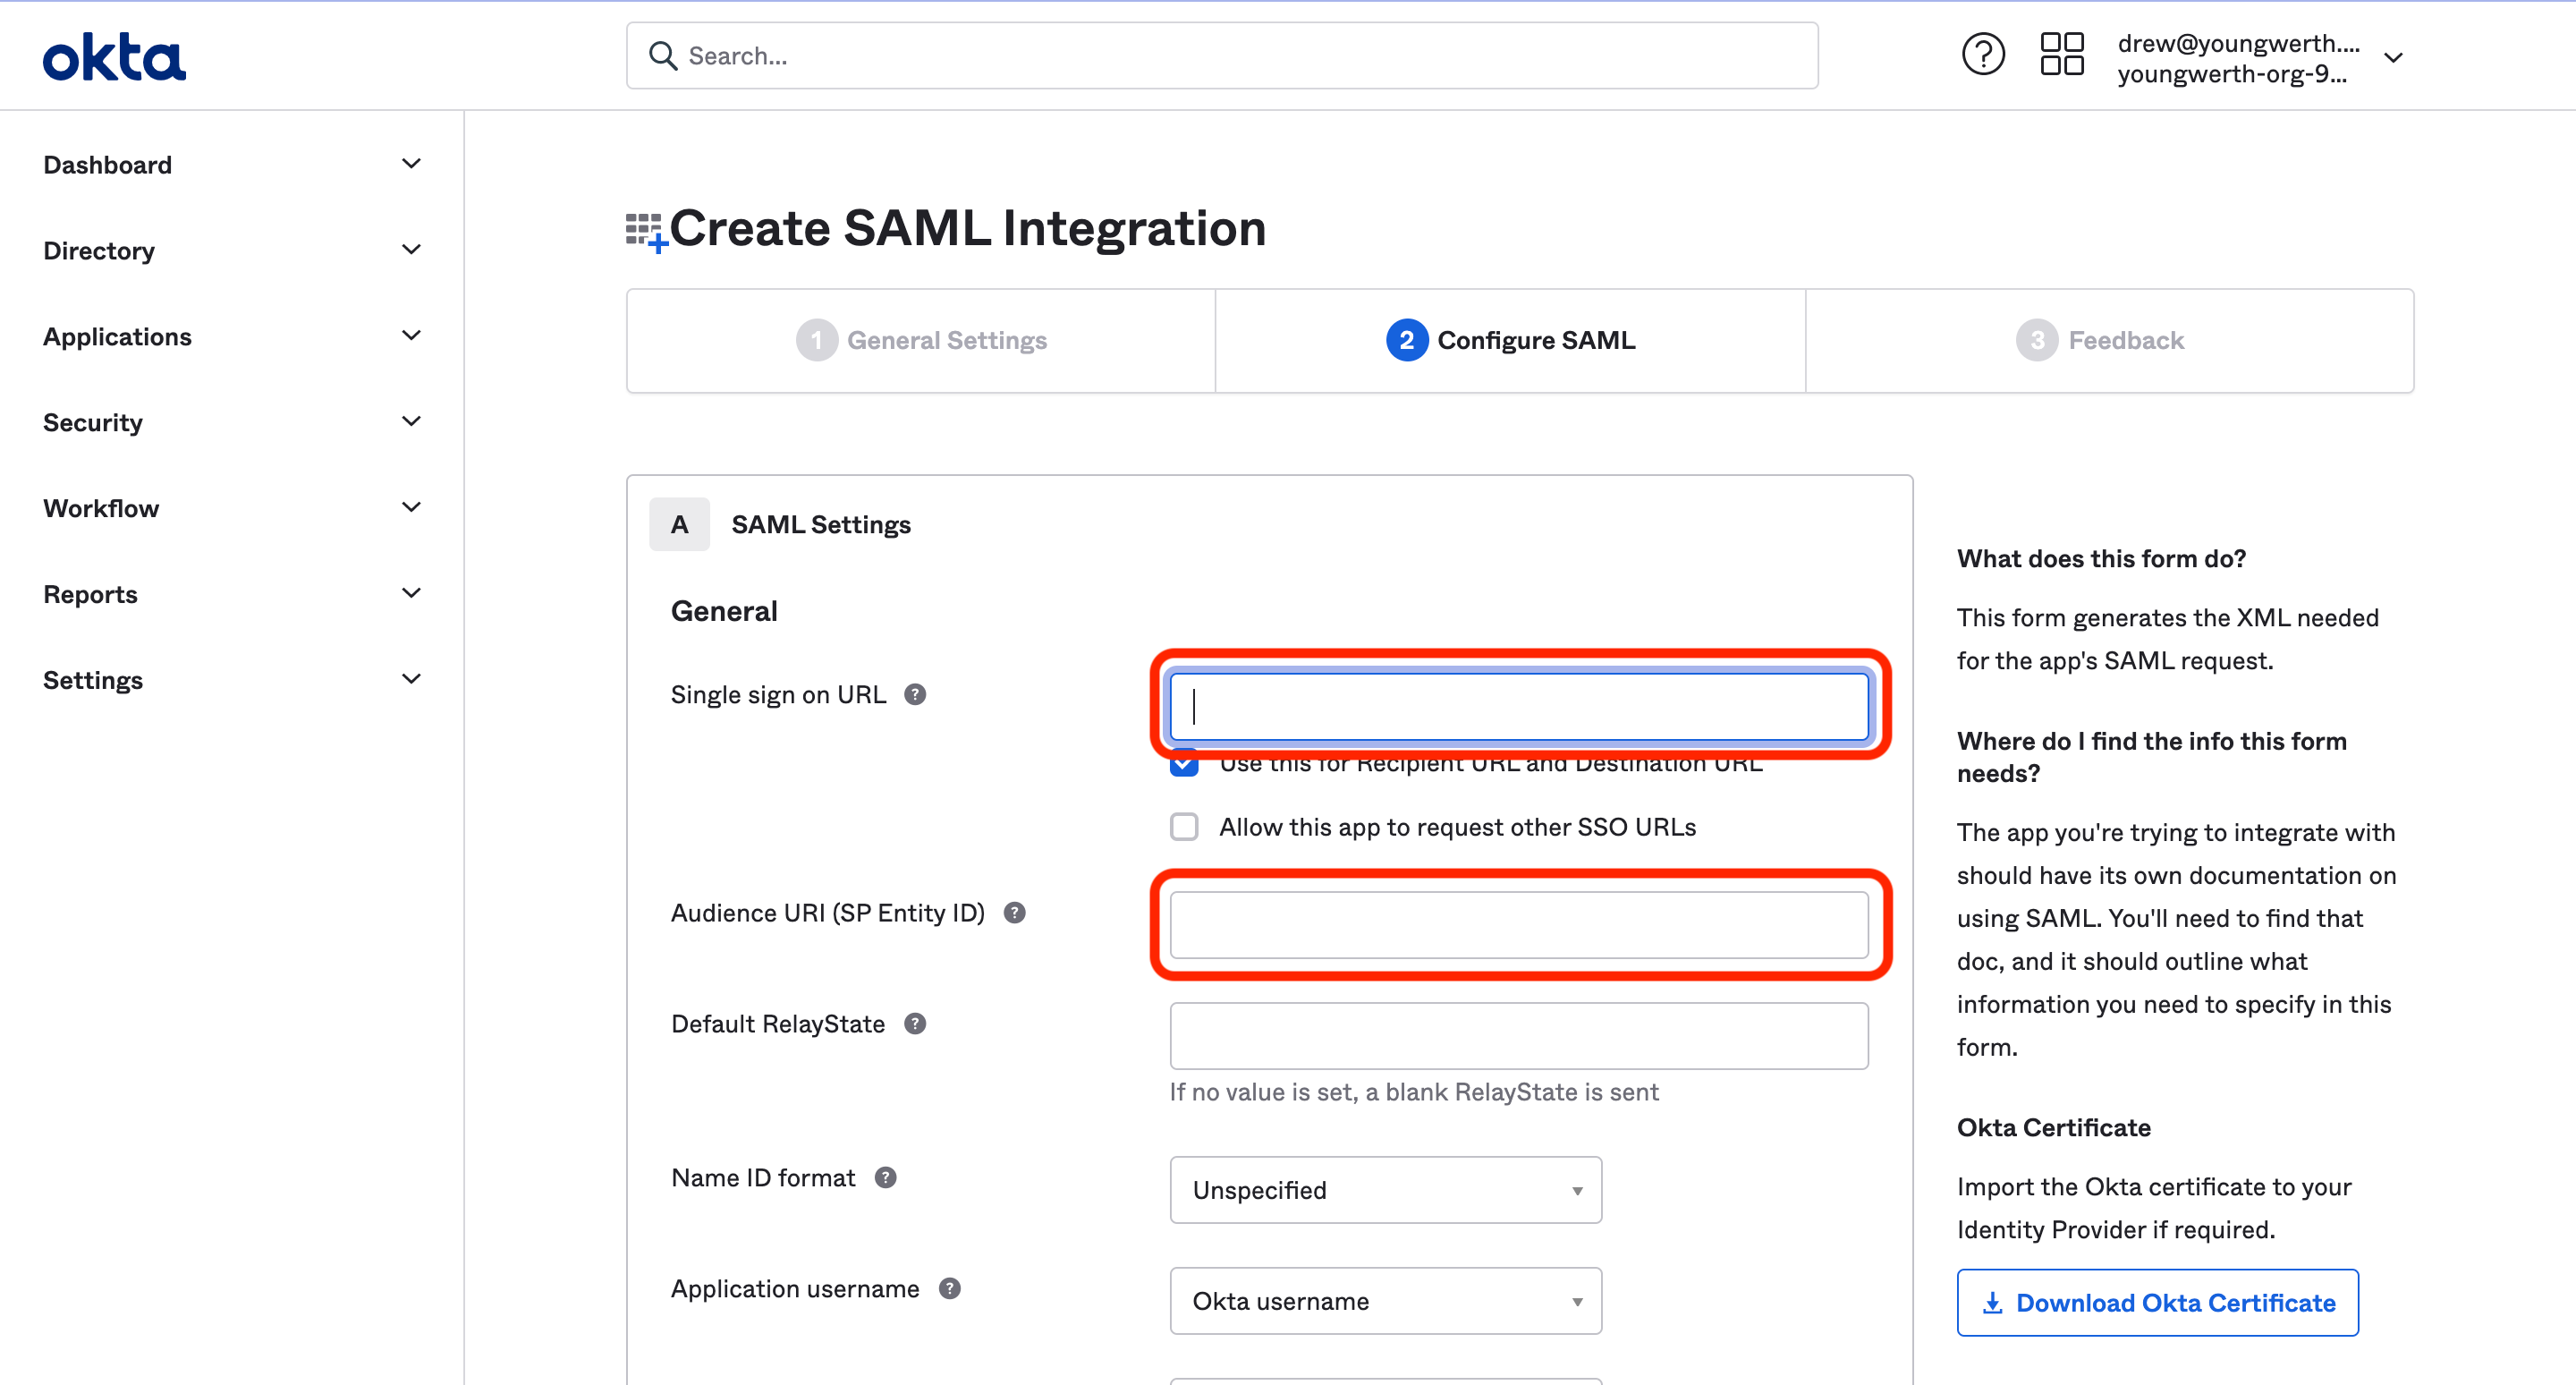
- Contact Courier support for a
Single sign on URLand anAudience URI. Enter them in their respective fields under SAML settings.
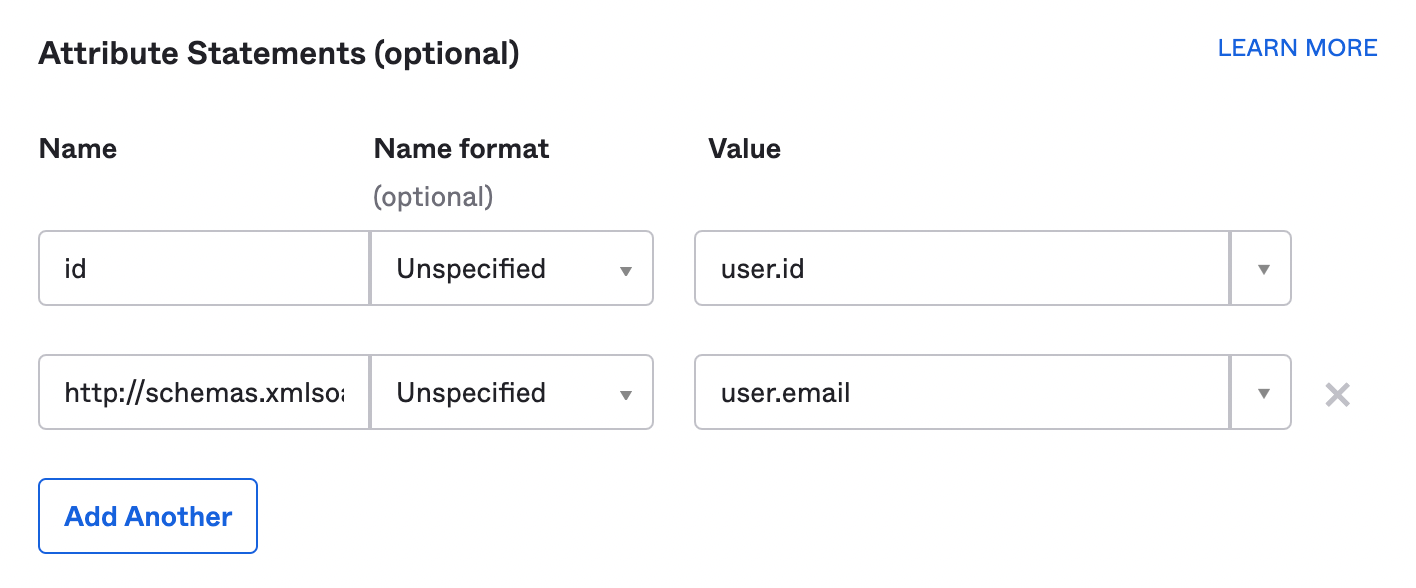
- In the Attribute Statements section, enter the following information:
| Name | Name Format | Value |
|---|---|---|
id | Unspecified | user.id |
http://schemas.xmlsoap.org/ws/2005/05/identity/claims/emailaddress | Unspecified | user.email |
- Hit the "Next" button towards the bottom of the page
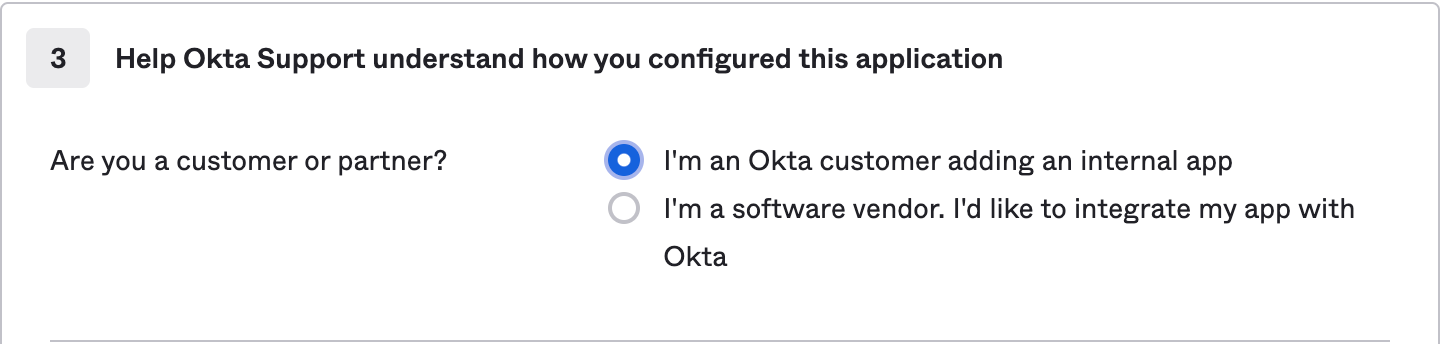
- Under the "Application Feedback" section, select "I'm an Okta customer adding an internal app" and hit "Finish":
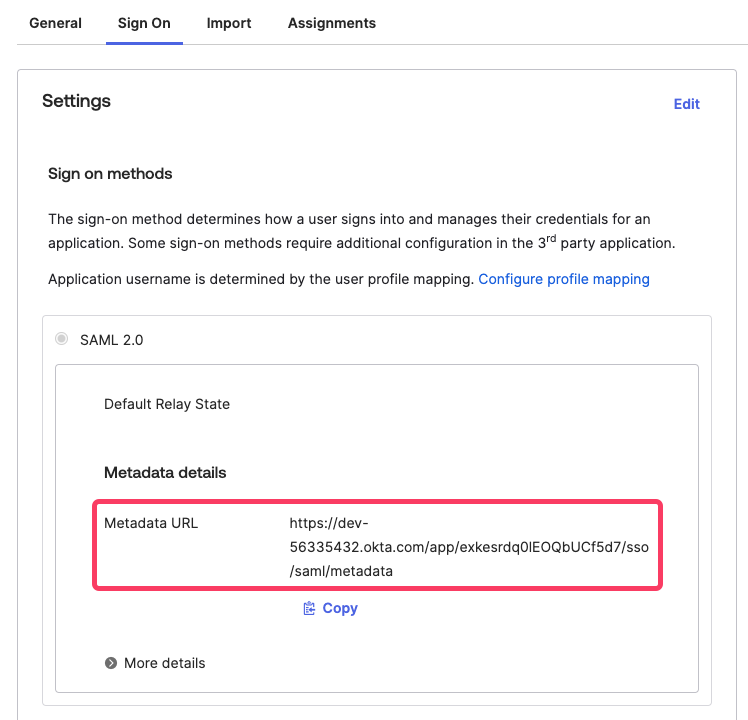
- From the "Sign On" tab of the new Courier application integration, find the Metadata URL. Copy the link address and send it to the Courier support team member
That's all thats needed to allow sign in with Okta. Be sure to assign users using the Assignments tab of Courier App Integration.
Creating a Courier Bookmark App
Bookmark apps are used to direct users to a specific web page using Okta applications. Below is a step-by-step process to create a Courier bookmark app within the Okta Admin Panel.
Before you can create a bookmark, you will need a bookmark URL from Courier for IdP initiated SSO to work. Please contact Support to get set up with the bookmark URL.
Steps
- Make sure you're logged-in to the Okta admin panel as an
Admin. - Expand the
Applicationsdrop-down in the left pane, then clickApplications. - Click
Browse App Catalog. - Search for
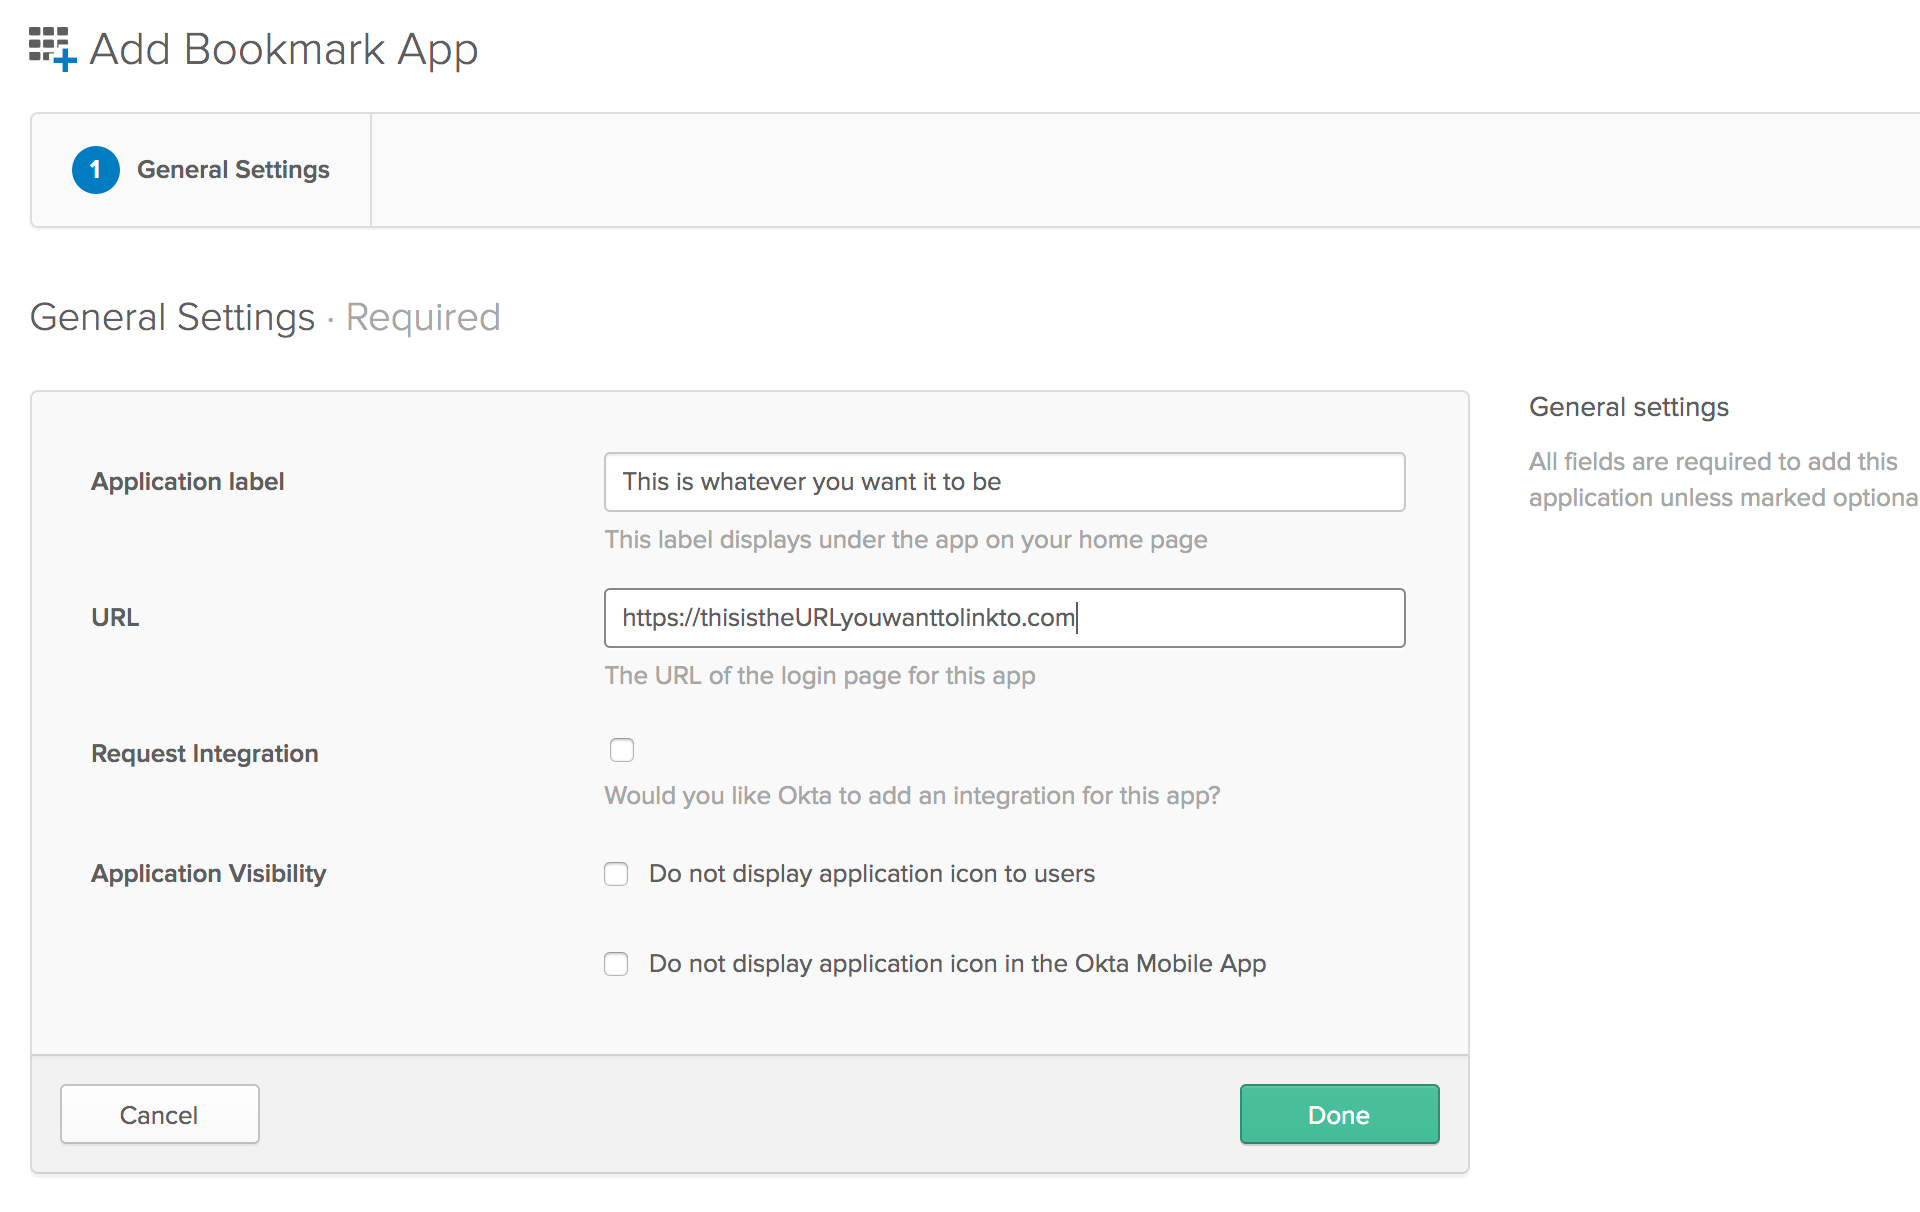
Bookmark App, select it from the list of results, and clickAddin the left pane. - Choose an app name, in this example
Courier Login, which will be the display name. - Copy the URL supplied by Courier Support directly to into the URL box:
- Click
Save. - Assign to users to test.
Migrating Users To Okta
From the Settings > Security page, confirm that "Require Google SSO" is not checked

From the Settings > Team page in Courier, remove and then re-invite users who should sign in with Okta
After the invites are sent
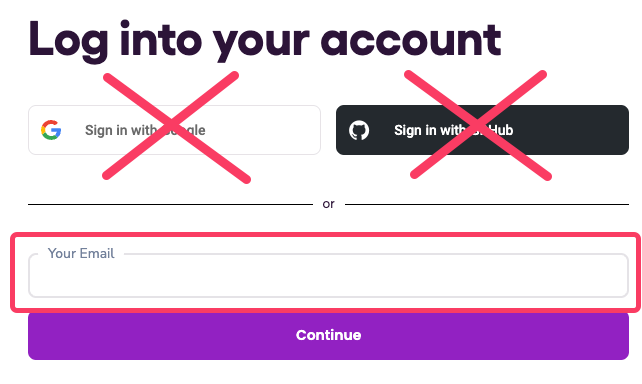
To accept an Okta invitation users should follow these steps:
- Sign out of Courier
- Click the "join" button from the email invite
- Enter your work email (the email address your invite was sent to)
- Hit continue
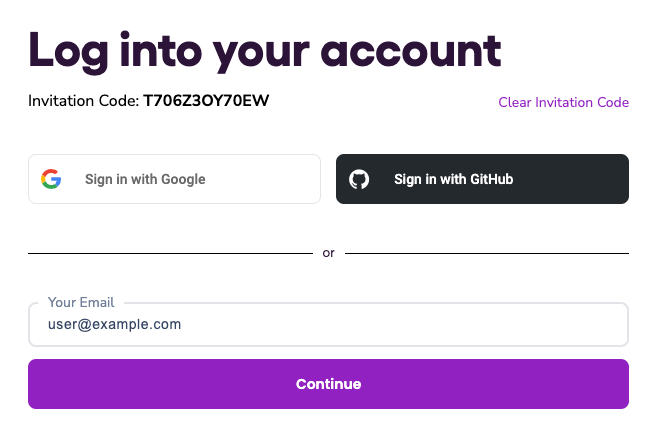
Users with Okta logins to Courier MUST use the email login process.
User Provisioning with Okta SCIM v2
- Contact Courier support for a SCIM endpoint URL and bearer token
- Navigate to the Courier App from the Okta admin panel
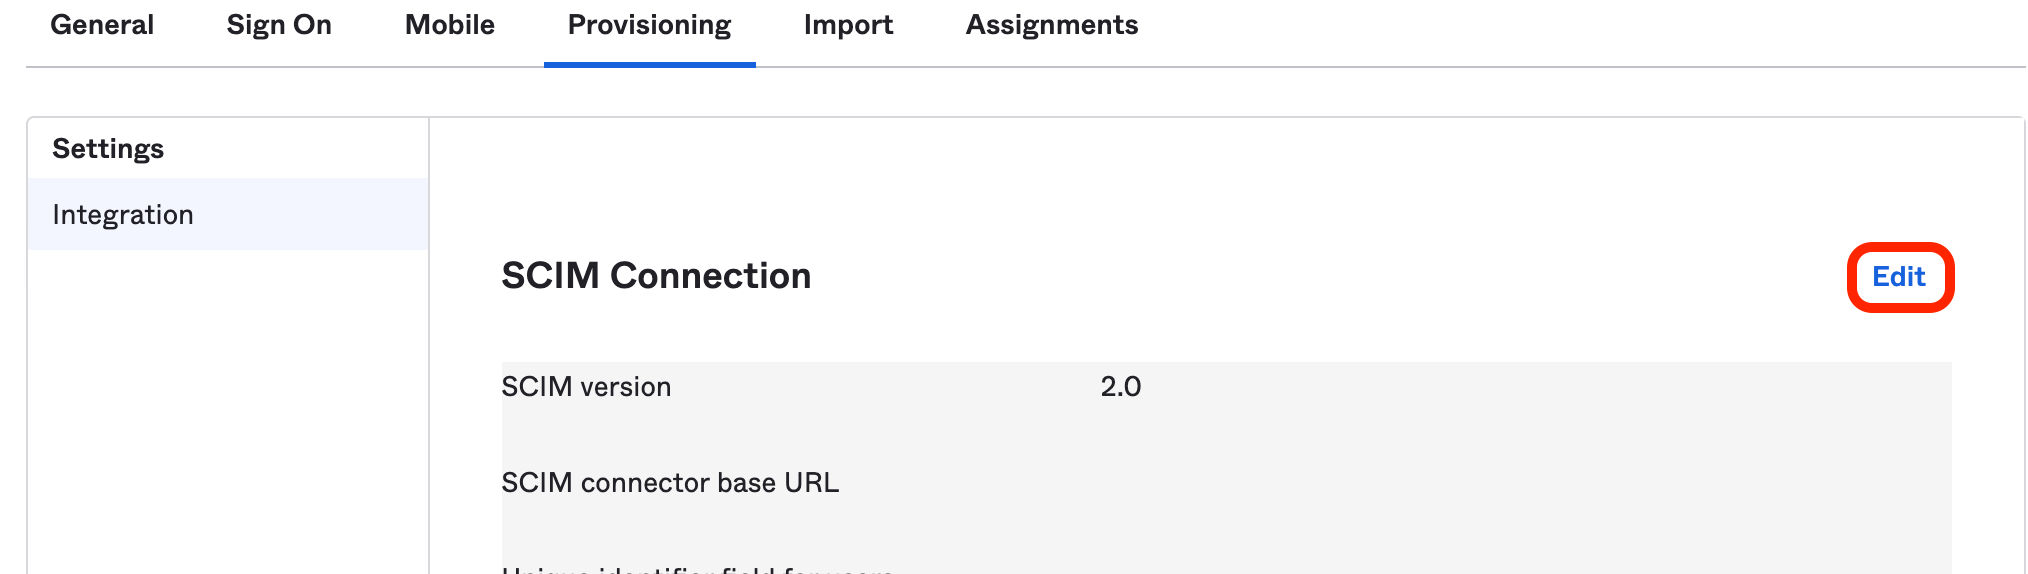
- Navigate to the provisioning tab and click "Edit"
- Enter the URL provided by Courier into the "SCIM connector base URL"
- Enter
userNameinto the "Unique identifier field for users" - Check "Push New Users" and "Push Profile Updates" for the "Supported provisioning actions"
- For "Authentication Mode" select
HTTP Header - Enter the Bearer token provided by Courier
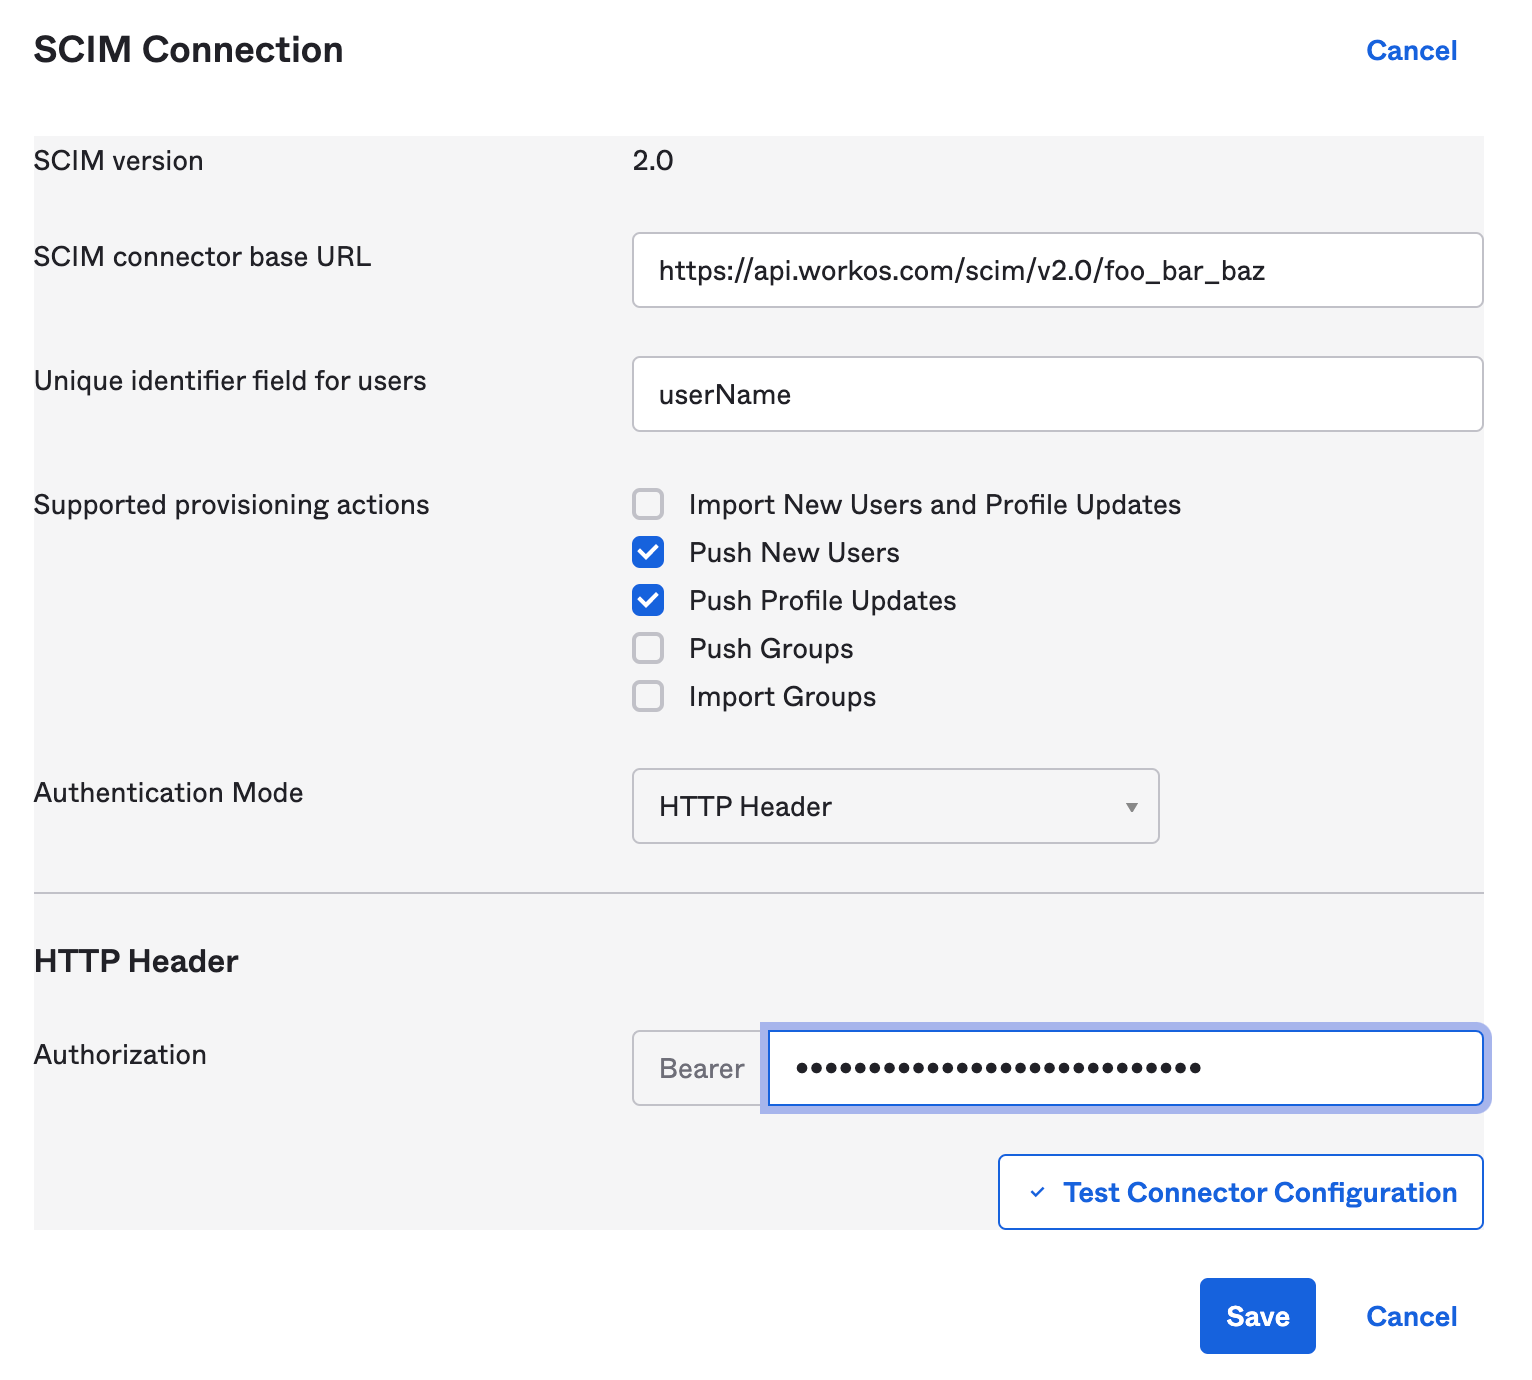
- Hit "Save"
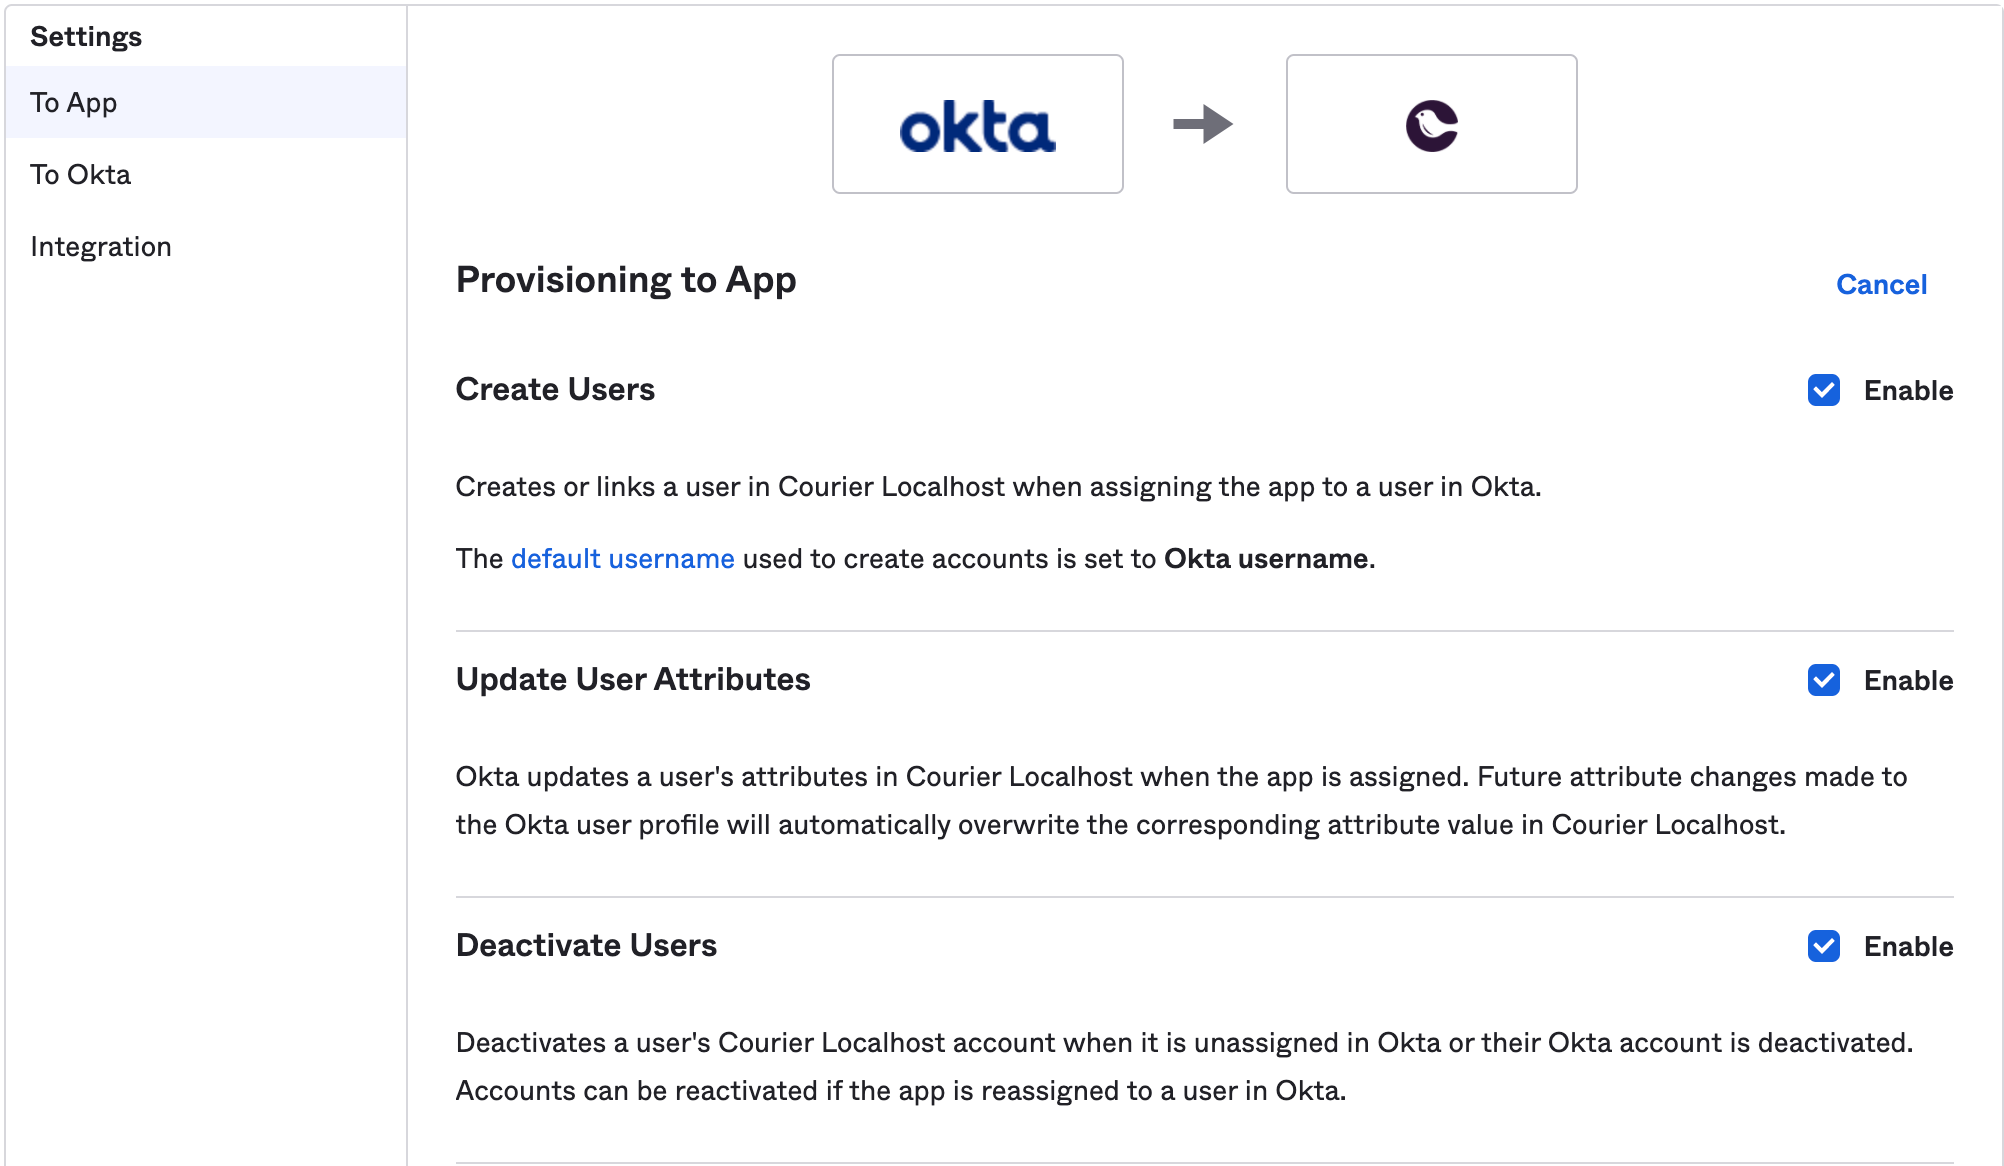
- After 30 seconds the provisioning tab should have a "To App" section on the left. If it doesn't, try refreshing the page. Once it appears select it and hit the "Edit" button
- Check the "Create Users", "Update User Attributes", and "Deactivate Users" features and hit save
- Using the side menu navigate to Directory > Profile Editor and hit the edit profile button of the Courier App

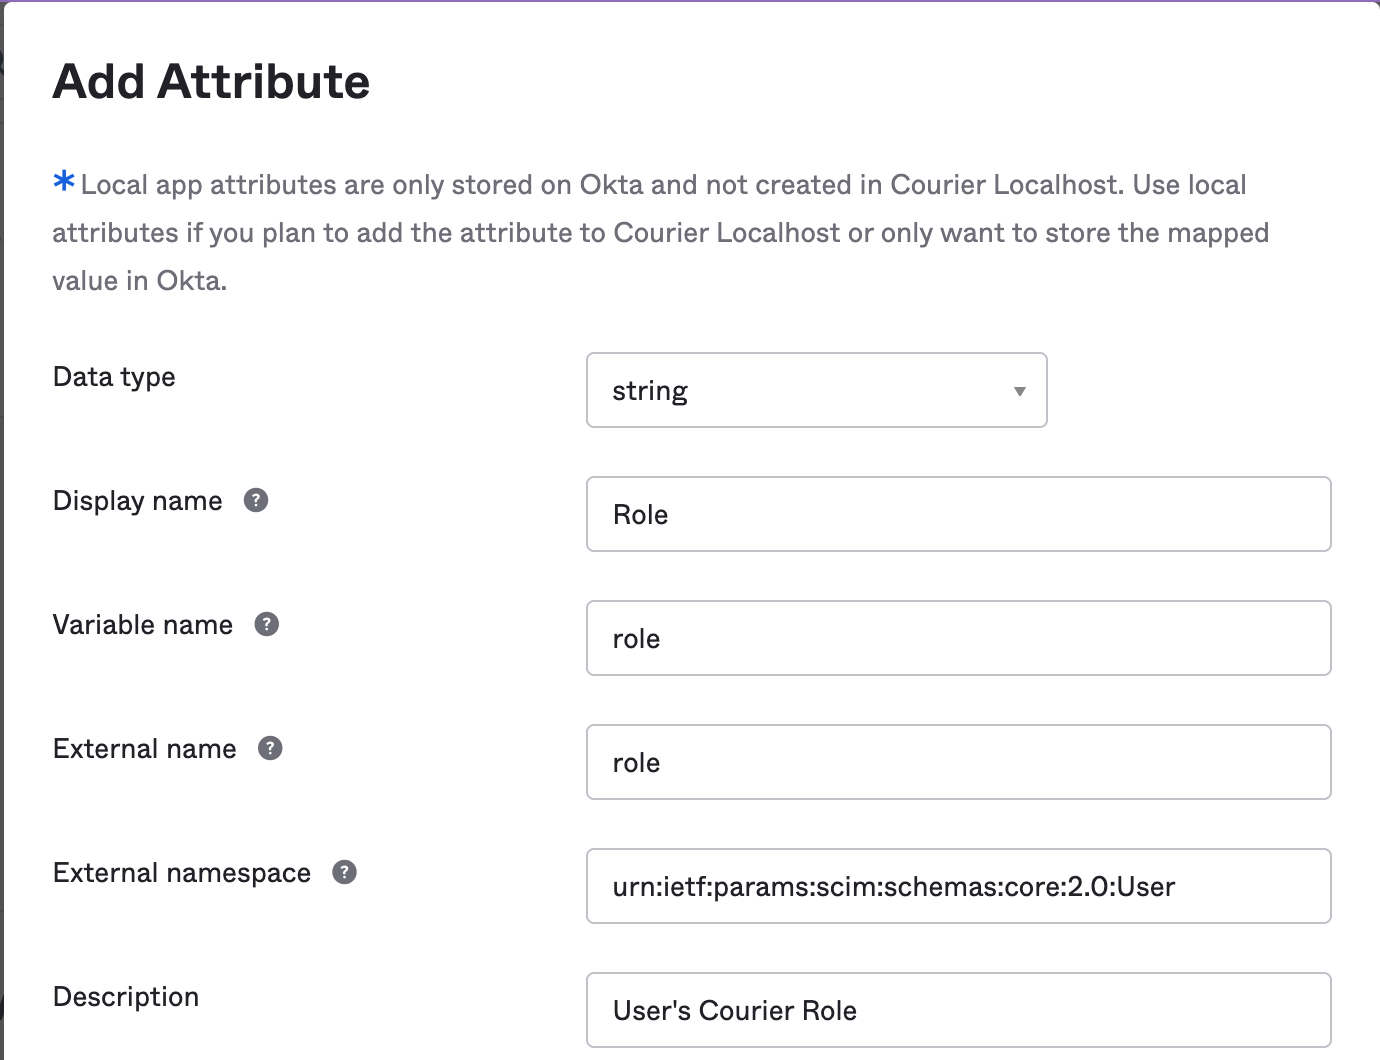
- Hit the "Add Attribute" button

Enter the following values:
- Data type:
string - Display name:
Role - Variable name:
role - External name:
role - External namespace:
urn:ietf:params:scim:schemas:core:2.0:User - Description:
Courier Role
- Data type:
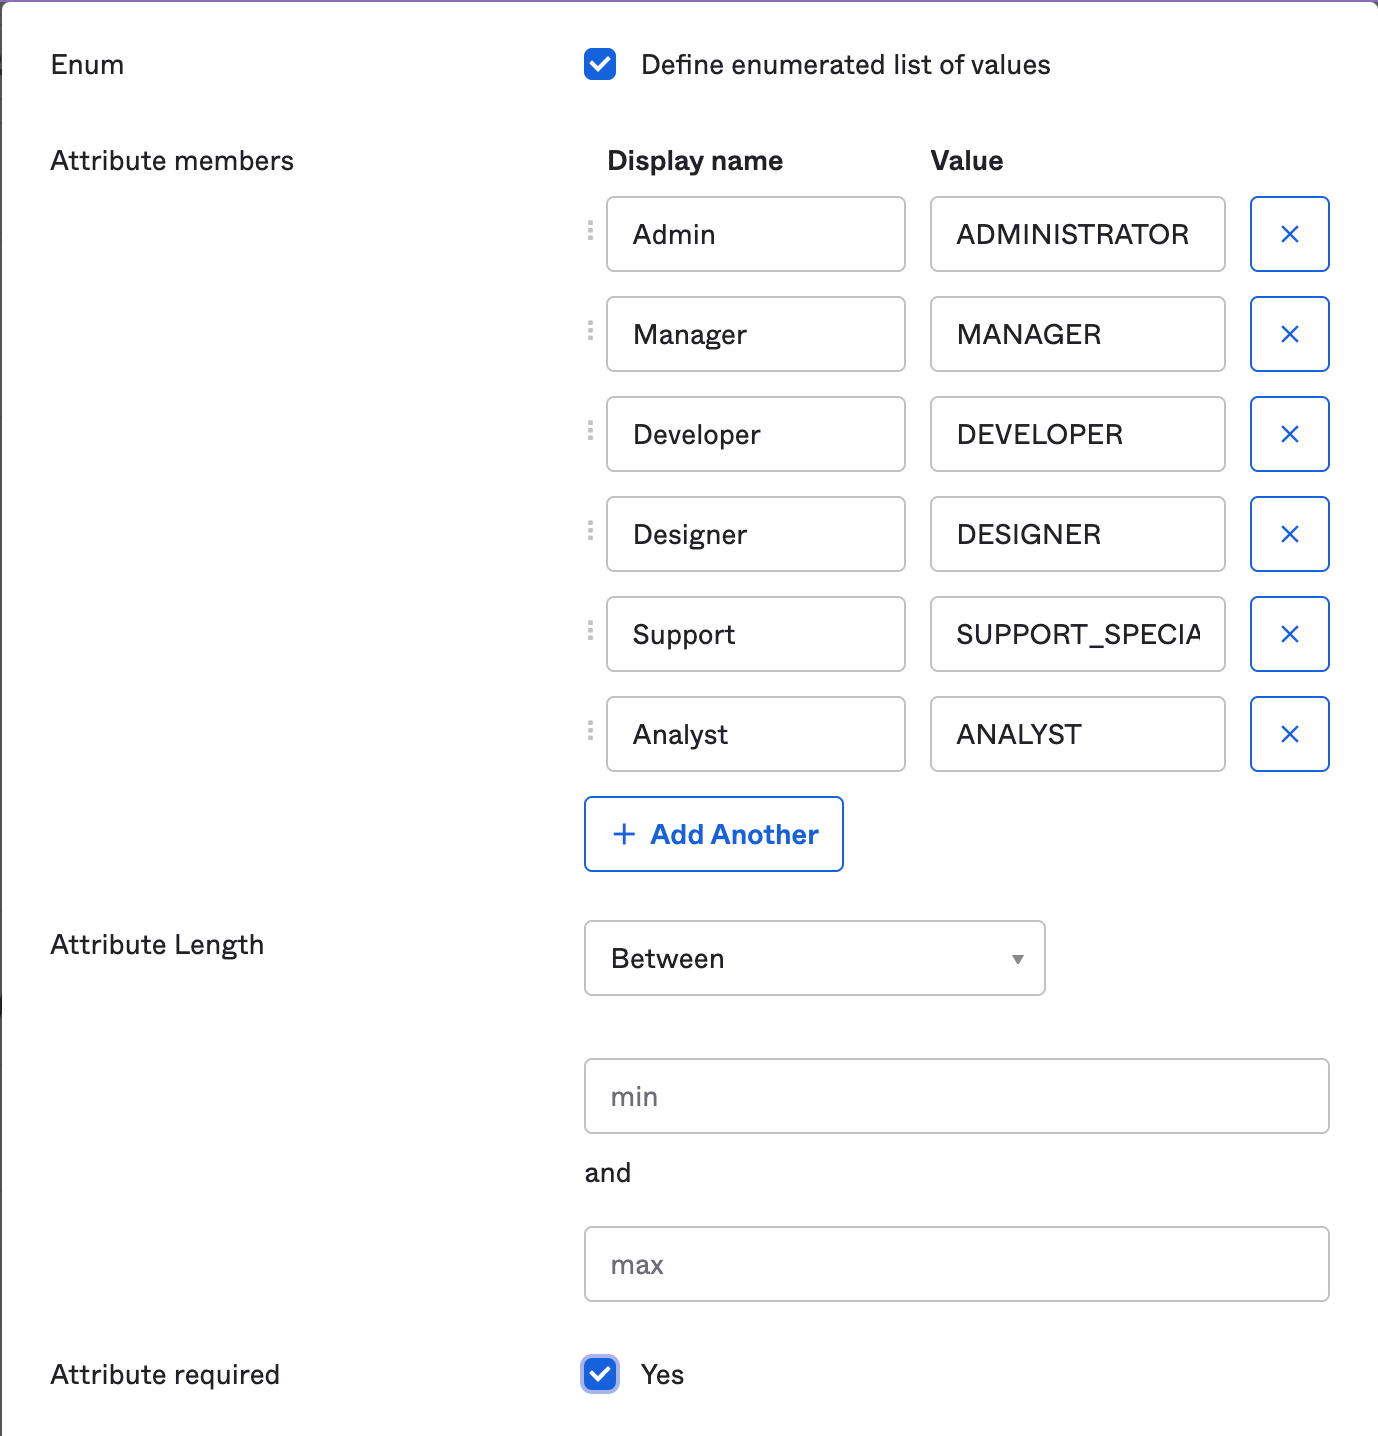
Check the "Define enumerated list of values" checkbox and enter the following values:
- Display Name:
Admin, Value:ADMINISTRATOR - Display Name:
Manager, Value:MANAGER - Display Name:
Developer, Value:DEVELOPER - Display Name:
Designer, Value:DESIGNER - Display Name:
Support, Value:SUPPORT_SPECIALIST - Display Name:
Analyst, Value:ANALYST
- Check the "Attribute required" checkbox and hit "save"
If users were already assigned to the Courier app before provisioning was setup, you will need to edit their assignment and update their role.
Provisioning is now enabled!
- Changes to user assignments in the Courier Okta app will automatically be reflected in the Courier Workspace.
- Users will receive an invite via email to Courier when added.
- Users are automatically removed from the Courier Workspace when no longer assigned in Okta.